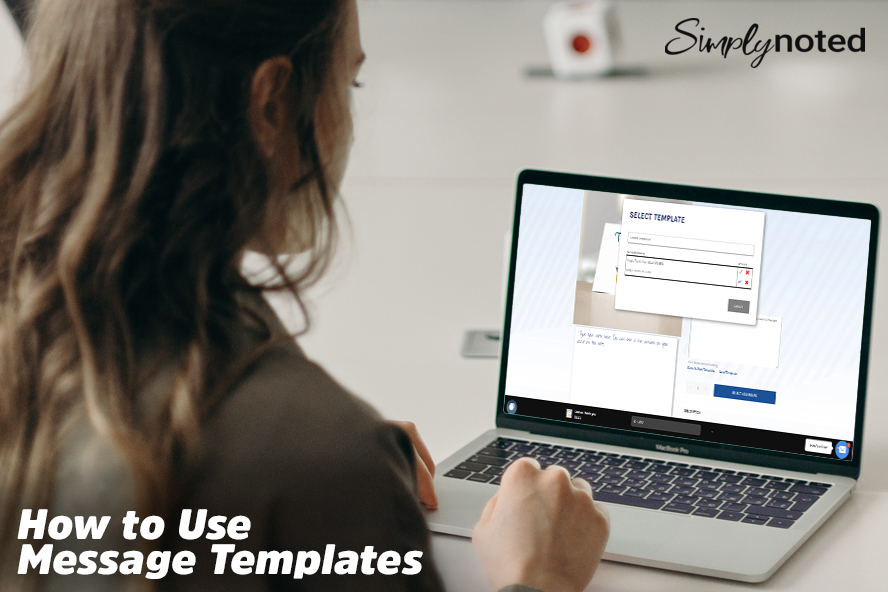
How to Use Message Templates
You’ve done it; you’ve sculpted the perfect business thank you card message. It strikes the right balance between authentic appreciation, practical flattery, and subtle self-promotion. The clients you’ve used it with have all responded positively, a few bringing you new business a few days or weeks later.
Your experience has sufficiently proven the business value of automated, handwritten cards from Simply Noted, and you want to start sending them at the conclusion of every project, but you don’t relish the time it will take to type your message into our interface every time you want to send a card. “If only,” you think, “there was a way to save message text for use in future cards. THAT would really be something!”
We’re happy to say that there is! Simply Noted offers message templates, an intuitive bit of functionality that lets you save message text for use in future cards. Instead of retyping your message every time you want to send a card, all you need to do is save it the first time you use it and then quickly apply your template with every future card. If you order a significant number of cards, the message templates feature will save you a lot of time.
But how does it work? Read on to find out.
SEE ALSO: How to Add a Gift Card to Your Order
CREATING A MESSAGE TEMPLATE
Adding a new message template couldn’t be easier. Two clicks within our standard card ordering process are all it takes.
To begin, log in to your account by clicking “Login” at the top right of the page. If you don’t yet have one, you can open an account in the same area. Accounts are necessary for saving data. Without one, you can’t save addresses to your address book, nor can you save message templates.
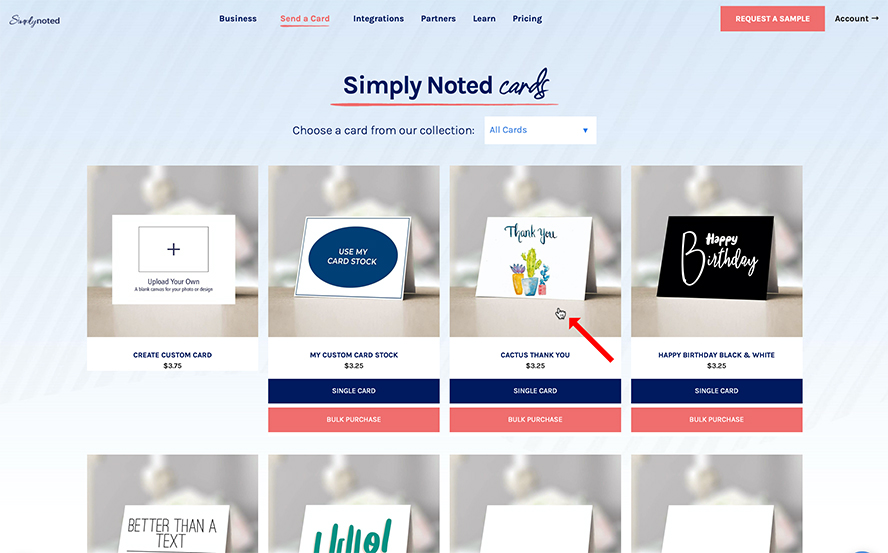
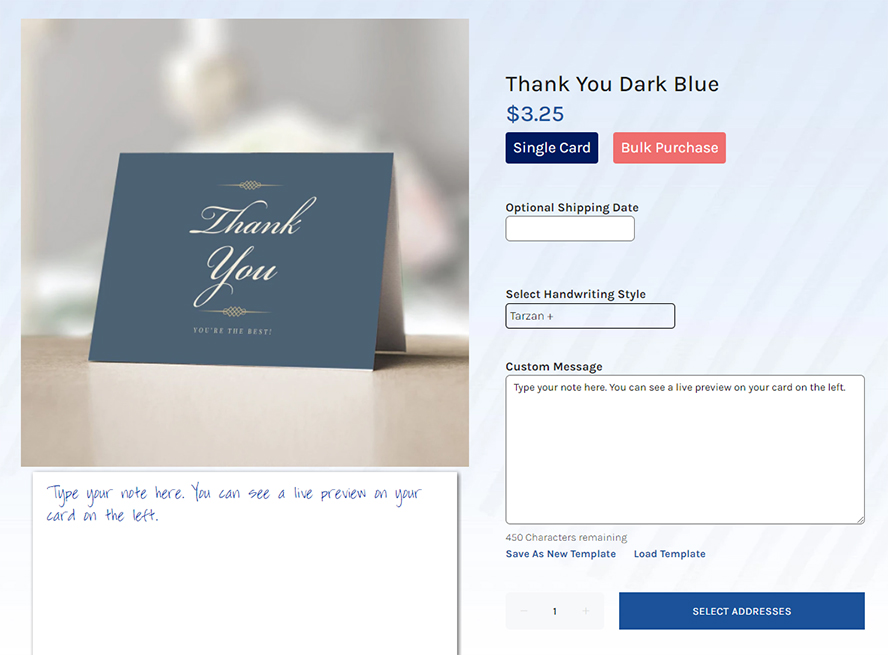
Once you’re logged in, start a new card order. Click “Send a Card” at the top of the page and then choose your desired card design. When it comes to saving message templates, it doesn’t matter if you choose a single card or a bulk purchase. You can save message templates with either and use them with either in the future.
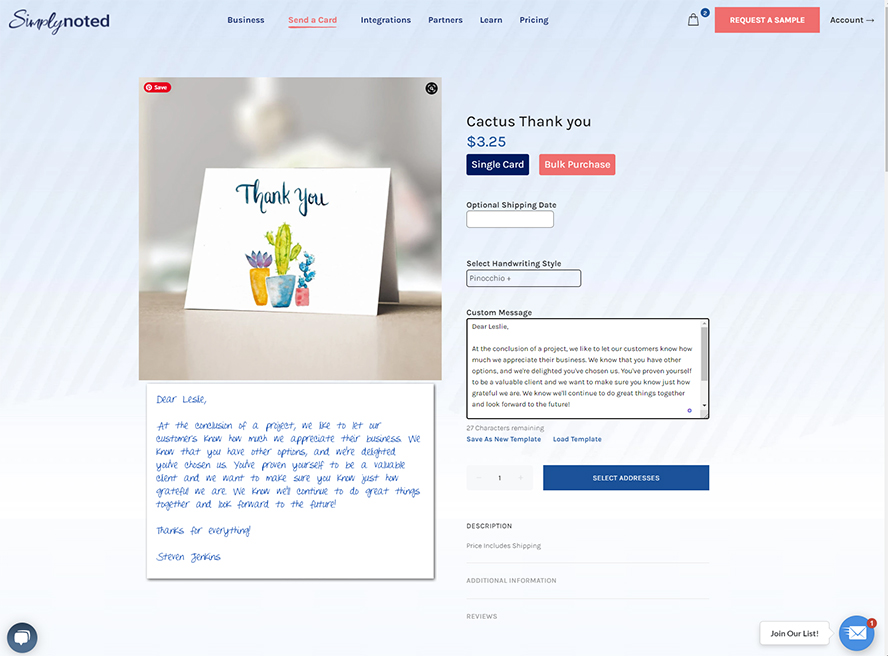
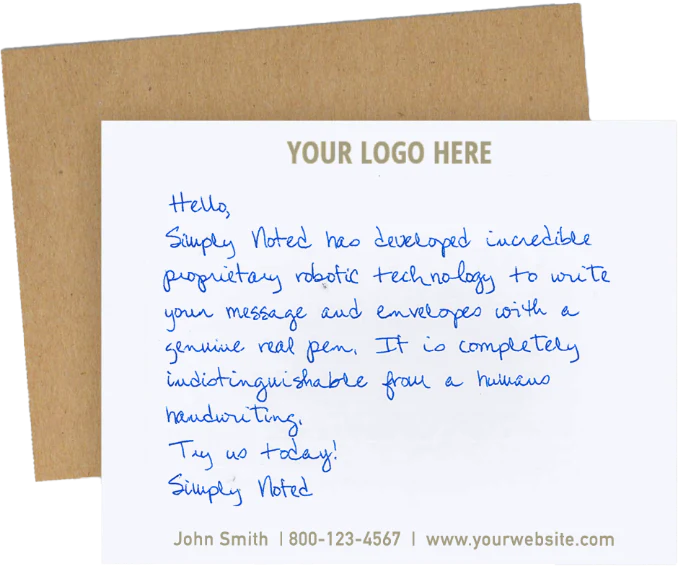
Type your message into the custom message area. You’ll see a live preview to the left, which will update in real-time as you type.
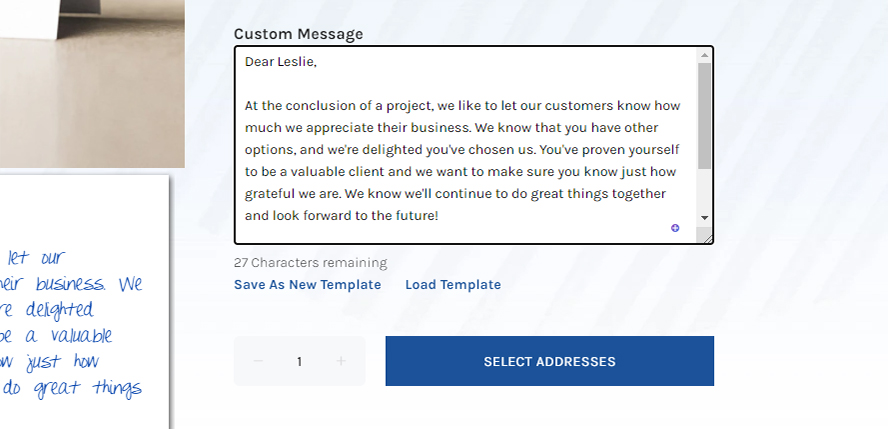
Once you’re happy with your message, click “Save as New Template” just underneath the custom message area.
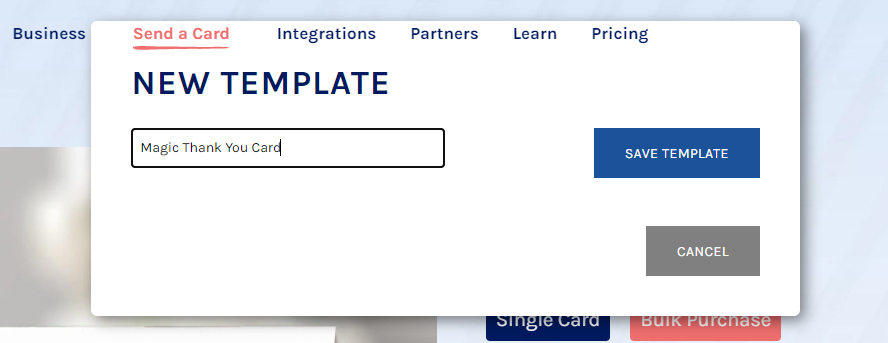
A dialogue box will pop up asking you to give your template a name and save it. Choose something meaningful that you’ll remember. These names are critical for finding your desired template in the future. Click “Save Template” to finish the process and add the new template to your account. By integrating our template saving function into the normal ordering process, we make it easy to turn any card message into a template.
SEE ALSO: How to Design a Custom Card Online
Ordering a New Card Using a Message Template
Once a template exists, it will be available to you for all future purchases, whether single card or bulk, manual or automated.
To demonstrate how easy templates are to use, let’s start a new card order. We’ll choose a different design and a new handwriting font.
Below the custom message area and next to the “Save as Message Template” button, you’ll see “Load Template.” Click this for a list of your available templates.
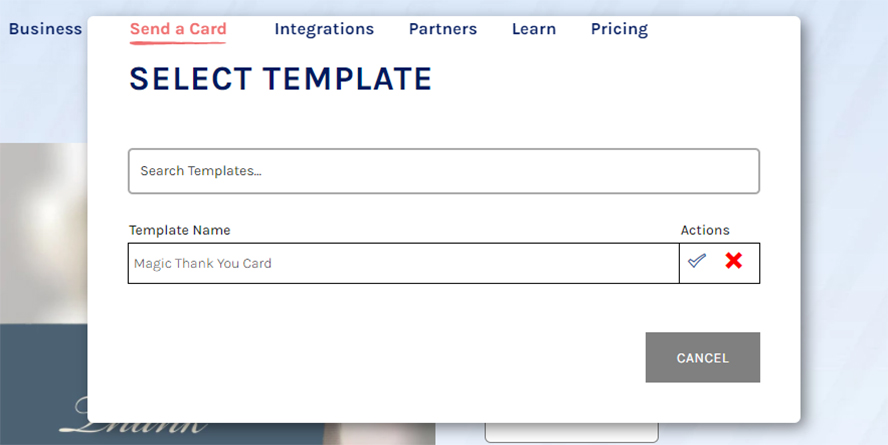
The resulting dialogue box displays all of your templates as well as a search bar for quick location. In this case, we only have one template, the “Magic Thank You Card” template that we created earlier. To delete a template, click the red X icon to the right of the template name. To use it in your current order, as we want to now, click the checkmark icon instead.
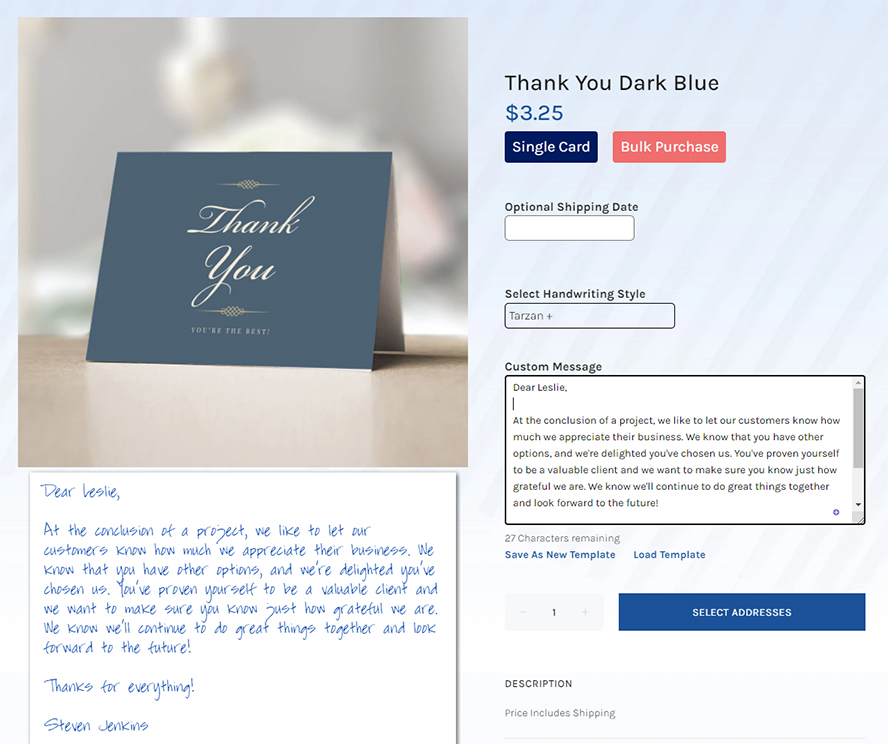
The dialogue box will disappear, returning you to the card ordering screen. You’ll see that the custom message field now sports the text from your template, and the live preview has been updated to reflect the new text. Without having to type a single character, your thank you card is added and ready for customization. We need only change “Leslie” to our new recipient and then move on to adding addresses.
We won’t go into the specifics of finishing your order here. For more information, check our previous tutorials to learn how to order a single card or make a bulk purchase.
SEE ALSO: How to Schedule an Order
USING MESSAGE TEMPLATES WITH BULK ORDERS
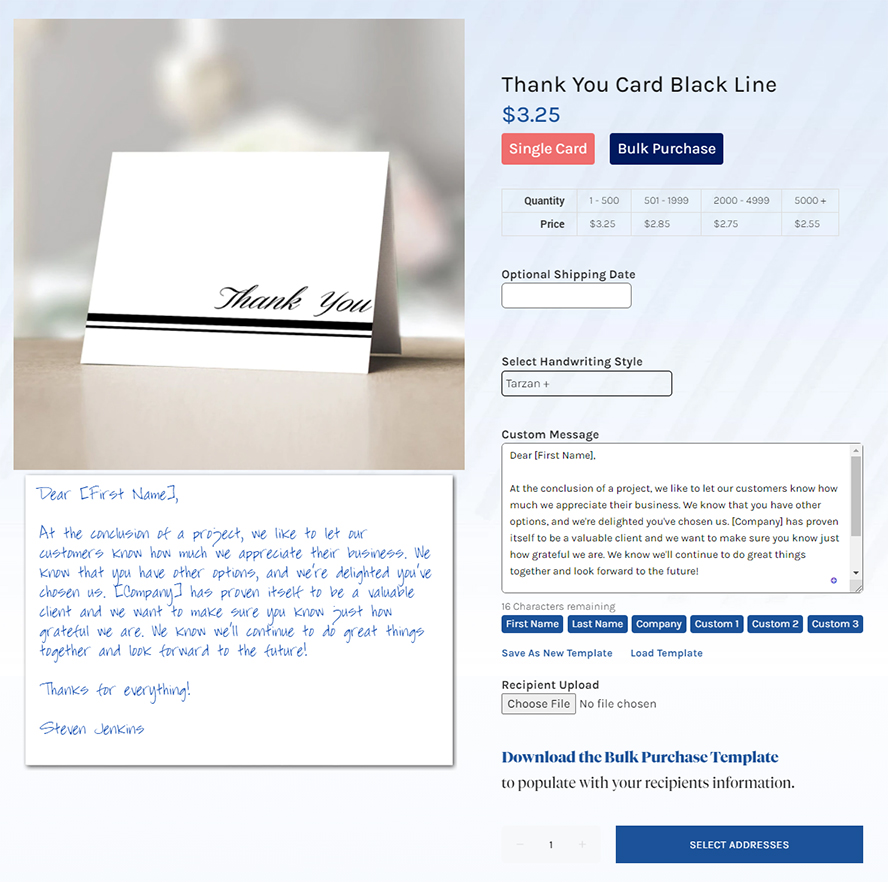
Want to step up your templating game? You can save custom fields for your bulk orders right along with your message template.
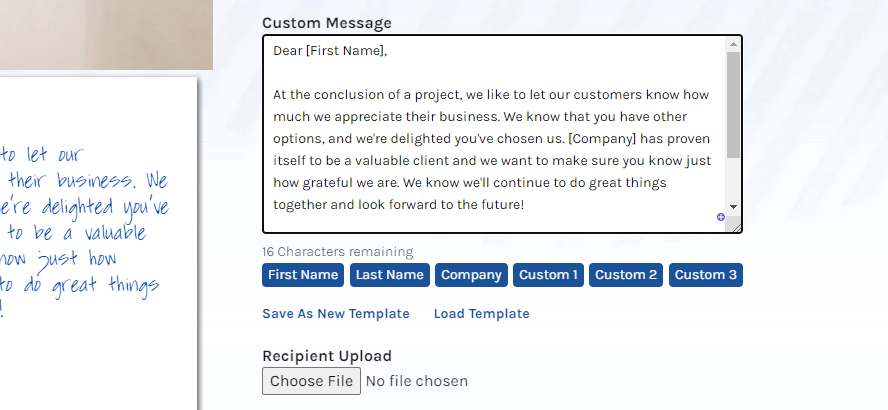
In this image, you can see we’re using the [First Name] and [Company] fields to pull each customer’s first name and company name from the Bulk Purchase Template we’re going to upload with all of our recipient’s mailing information. Check our bulk purchase tutorial for more details on that part of the process. For now, it’s enough to understand that each address on our Bulk Purchase Template will be assigned to its own card, and the name and company custom fields will update automatically for each person on the list.
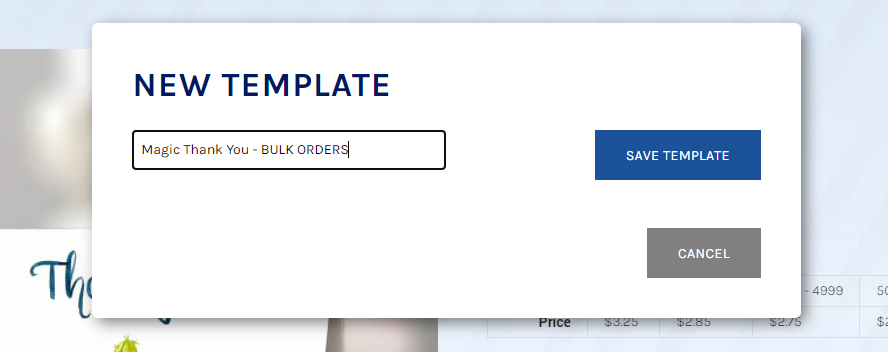
We’ll click “Save as New Template” as we did before and give this new template a name. Since it’s the bulk version of our original thank you card, we’ll use a similar name. We’ll click “Save Template” to add it to our account.
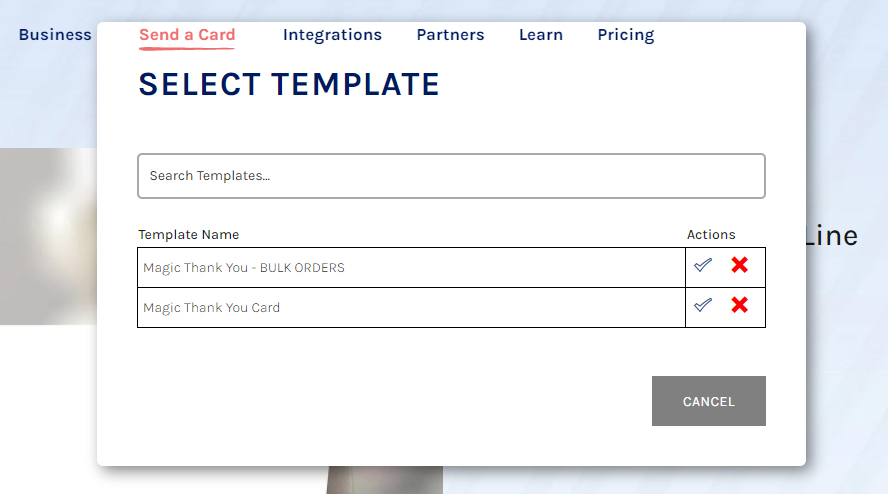
For future bulk orders, we can pull in this version of the template, and all of our custom fields will be ready to use. You can see we’re choosing it from our available templates.
And it’s added to our new card order. You can see the custom field structure is intact. It’s that simple to create personalized, bulk handwritten card orders with Simply Noted.
Our message template feature is fully customizable. You can use it to hold favorite birthday messages, common welcome cards, your most meaningful holiday wishes, and more. Really any card text that you use with regularity can be added to a template for future use. It’s just another way that Simply Noted is improving handwritten mail for businesses and consumers. Try it today!
SEE ALSO: How to Cancel an Order