How to Use Your Address Book
At Simply Noted, we’ve designed our system to be as user-friendly and straightforward as possible. That means a painless ordering process that works the way you expect it to. We offer a live preview of your card, in the handwriting of your choice, that updates as you type. We provide message templates to speed the execution of repeat orders. And, of course, you have access to an intuitive address book that makes it easy to send cards to everyone on your list.
This tutorial will show you how to get the most from your Simply Noted address book. Other useful tutorials we’ve published in the past include how to send a card, how to make a bulk purchase, how to schedule an order, how to design a custom card, and how to add a gift card. Check them out for more information on using your Simply Noted account.
For now, let’s dive into your address book.
HOW TO FIND YOUR SIMPLY NOTED ADDRESS BOOK
To use the Simply Noted address book, you’ll need to open an account. Click “Login” in the top-right corner of the Simply Noted website. If you have an account already, you’ll be able to log in. If you don’t, click “create an account” and fill in the requested information.
Once you’re logged in, the site will take you to your account page. If you’re already logged in elsewhere on the site, you can click on “Account” in the location where “Login” was previously to access account information.
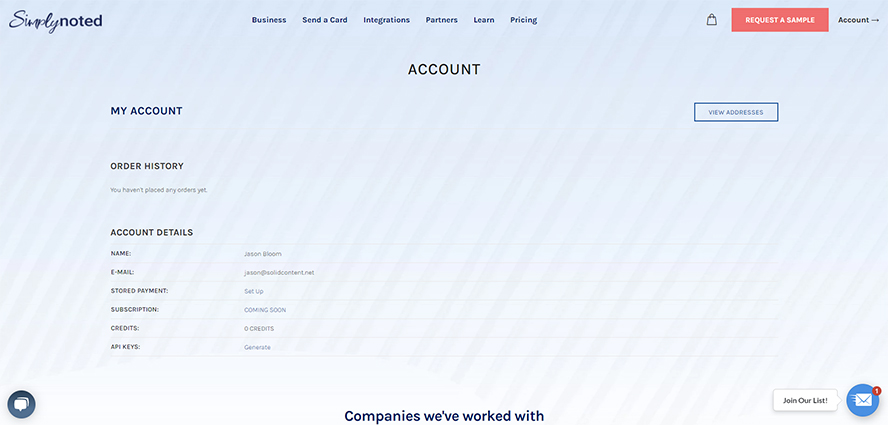
Once on your account page, you’ll see your order history and account details. Look to the top right and find the “View Addresses” button. This will take you to your address book.
SEE ALSO: How to Address an Envelope
MANAGING YOUR ADDRESS BOOK
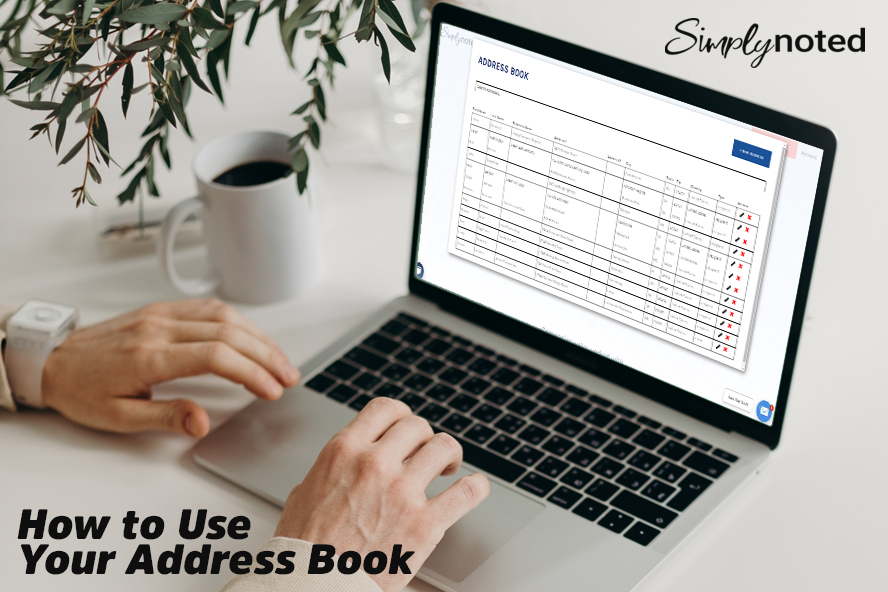
You’ll see all of the addresses you saved previously displayed in the order that you added them. You’ll see complete addresses as well as each entry’s status as either a return or recipient address.
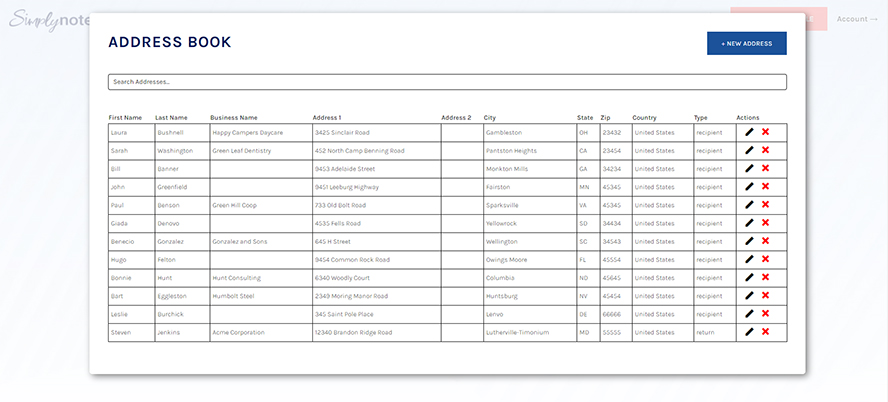
You can search for a specific address using the search bar at the top. You can edit existing addresses by clicking the pen icon to the right of the entry. The red X icon allows you to delete entries. To add new addresses, click “+ New Address.”
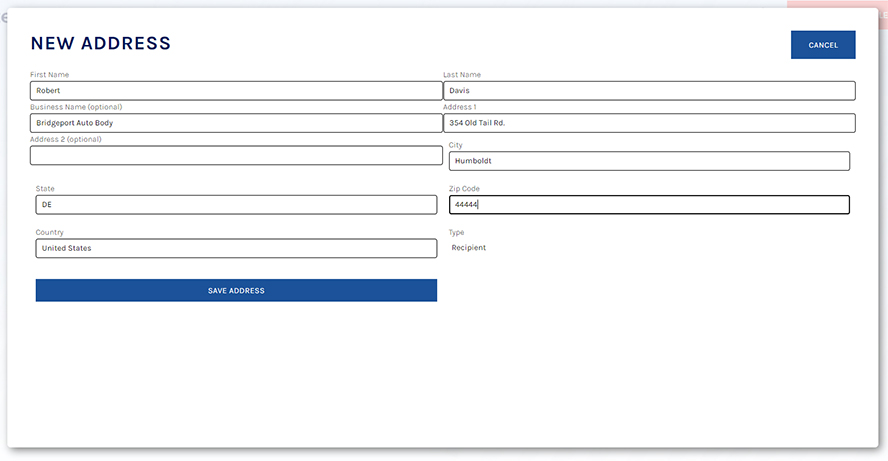
You’ll be presented with a data entry screen. Enter all relevant address information, and don’t forget to specify whether the new entry is a return address or a recipient address (don’t worry, you can edit any of the information later.) Click “Save Address” to add the new record to your address book.
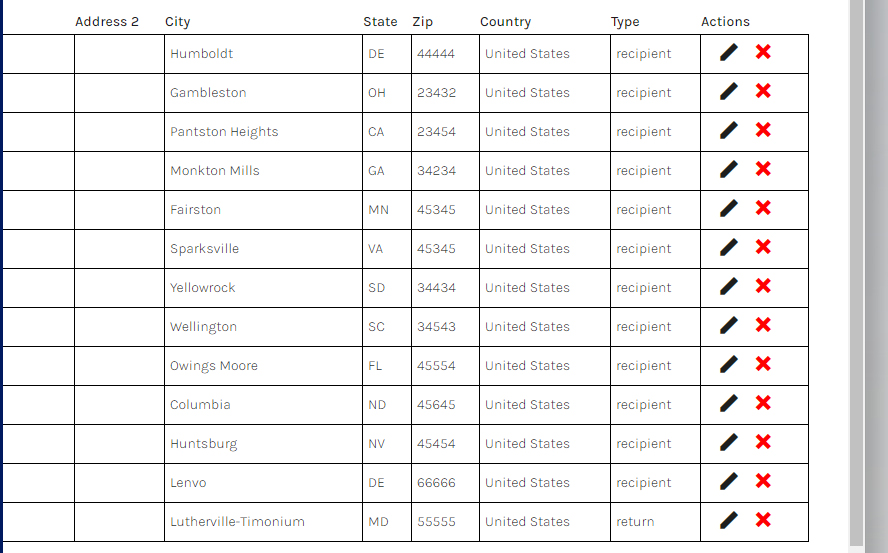
Editing an existing address is just as easy. Clicking the pen icon will bring up the same address entry screen from above, already populated with the address you selected. Make your edits and then click “Update Address.”
PLACING AN ORDER USING YOUR ADDRESS BOOK
It’s simple to add an entry from your address book into a new order. To initiate the process, click on “Send a Card” at the top of the page.
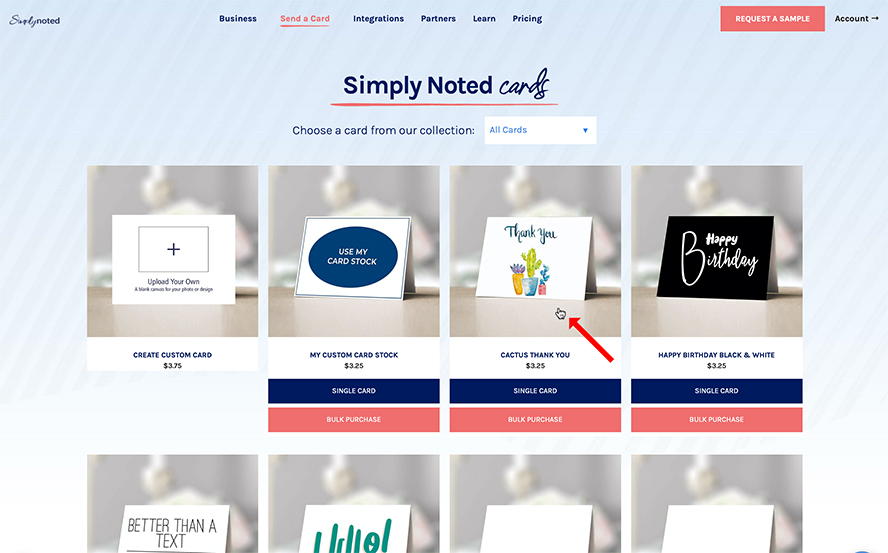
You’ll see our full selection of cards. Choose the design you like and pick “Single Card” (we’ll talk about bulk purchases in a bit.) This will take you to our order screen.
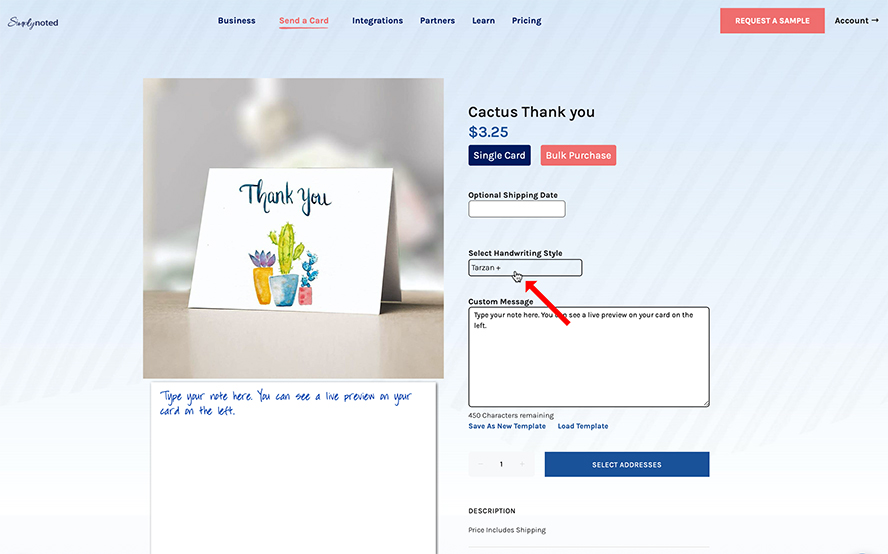
If you need the card delivered on a specific date, enter it in the optional field. Then choose your handwriting style and enter your desired message. You’ll see a live preview of your card on the left side of the screen that will update as you type.
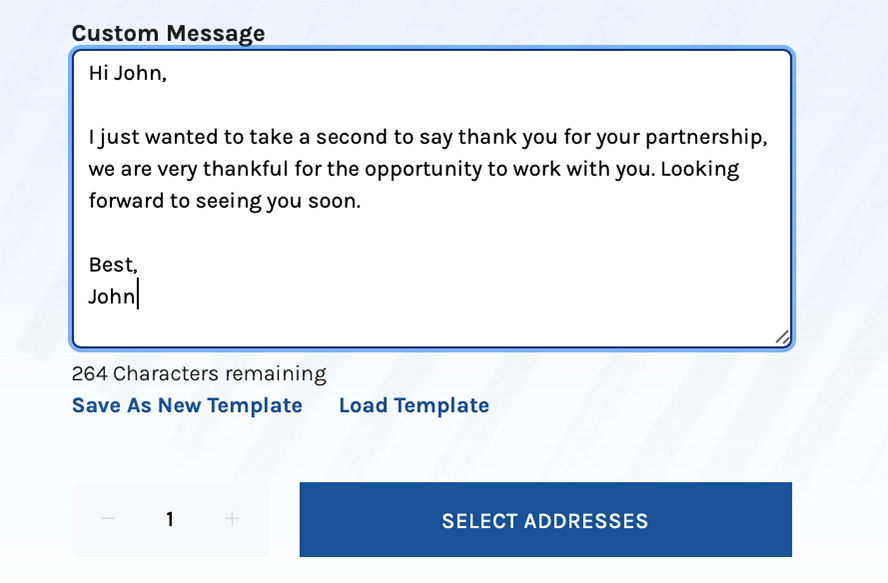
Once you’re satisfied with your card, click “Select Addresses.” You’ll be taken to the address entry screen, where you’ll select your return and recipient address. You can add new addresses in both categories by clicking “New Address.” Addresses you add here will be added to your card as well as your address book for later use.
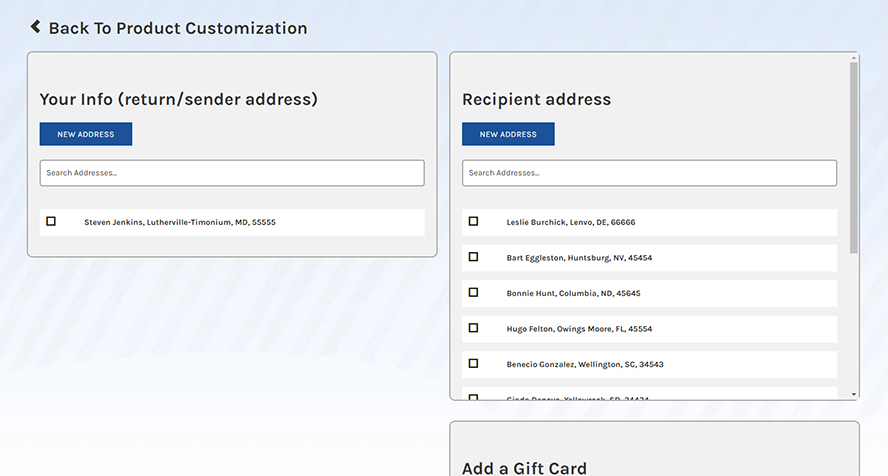
In this case, we want to add previous addresses from our address book, and it couldn’t be easier. Directly below the “New Address” buttons, you’ll see a search bar similar to the one we saw earlier. You can search your entire address book from here.
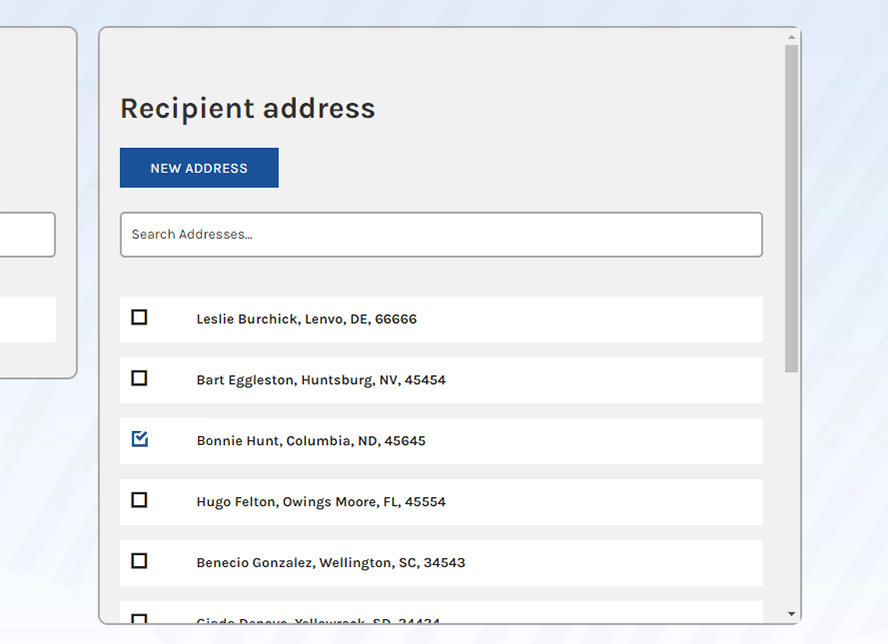
Below that, you’ll find all of your saved addresses. To use one, simply check the selection box to the left of your desired address. If you don’t see the address you’re looking for, scroll down until you do. If you added a new address, you’ll find the entry at the bottom of the list, already selected and ready to go.
SEE ALSO: What I Learned Sending 1,000,000 Handwritten Notes
FINALIZING YOUR PURCHASE
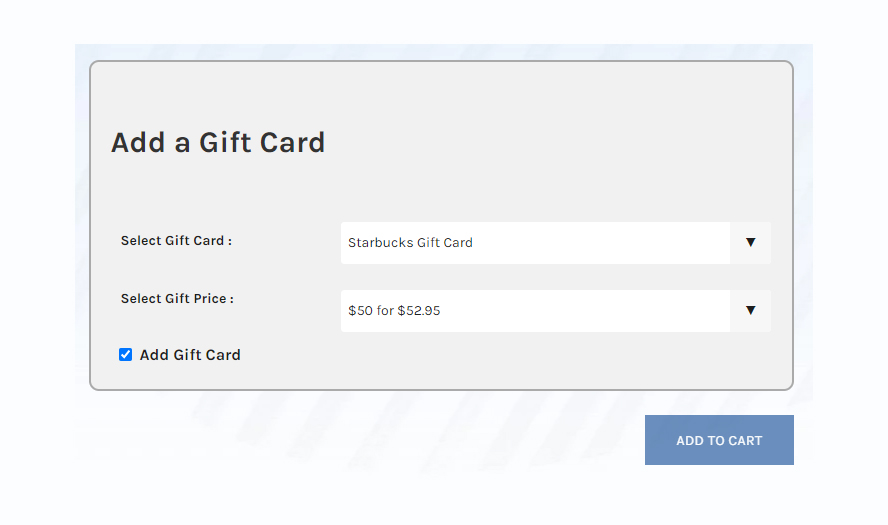
Be sure to choose both a return and recipient address. If you’d like to add a gift card to your order, you can do it from this screen as well. Then click “Add to Cart.”
You’ll be taken to your cart. Inside you’ll see the card you just ordered, complete with your font selection, your chosen message, and the two address you just selected from your address book.
If you’d like to add additional cards, select “Send a Card” again, and repeat the order process. Once you’re finished, you’ll see all of your card orders as discrete entries in your cart. Select “Proceed to Checkout” at the bottom when you’re satisfied with your order and follow through with the payment process.
USING YOUR ADDRESS BOOK WITH A BULK ORDER
When placing a bulk order, you’ll notice that you can only use your address book for the return address. That’s because bulk order addresses are added by completing and uploading our Bulk Purchase Template, a CSV that’s easily edited in Excel or Sheets. It can also be populated automatically by exporting customer data out of your CRM.
We handle bulk purchases this way because it facilitates the addition of large address volumes and allows users to leverage custom fields to personalize each iteration of a card. If you make frequent bulk purchases, be sure to keep your previous Bulk Purchase Templates handy for easy reuse.
SIMPLY NOTED’S ADDRESS BOOK HAS YOU COVERED
Every time you add a new single-card address, our server will automatically add it to your address book. Over time, you’ll find yourself adding addresses less and less frequently as more of them become available in your address book.
Have you ordered yet? If not, now’s the perfect time to give Simply Noted a try!


