How to Set up a Zoom Meeting Plus Tips and Tricks

Zoom and other online teleconferencing applications like Teams and GoToMeeting have become necessities since the COVID-19 pandemic began. In the process, they’ve radically changed the way the world does business.
Meetings of all kinds, from planning sessions to sales calls, school lectures to birthday parties, are being held virtually using these applications. And while they’re all growing in popularity, one has taken a dominant position in the virtual meeting ecosystem — Zoom.
To give you a sense of the platform’s immense growth, in December of 2019, the company saw roughly 10 million meeting participants each day. By October of 2020, just under a year later, daily meeting participants were up to 300 million, a 2,900% gain!
With that sort of astronomical usage, it’s almost certain that you’ve been in a Zoom meeting at least once in the last year. But that doesn’t mean you would know how to set on up on your own. Far more users attend meetings created by other people — far fewer ever set one up for themselves. If you’ve been in the former camp but now find yourself needing to learn the process, read on. We’ll break it down step by step and then offer a few tips and tricks to ensure a successful Zoom meeting. Let’s get started!
SEE ALSO: How to Thank Essential Workers
CREATING A ZOOM MEETING
Creating a meeting in Zoom is easier than you might imagine. There are a couple of different ways to approach it, and you can choose whichever works best for you. Meeting start times define the main difference between the two. You can either start a meeting immediately or schedule one for later.
SEE ALSO: How 365 Thank You Cards Will Change Your Life (and Your Business)
Starting a Zoom Meeting Immediately
Let’s say you need to gather a team together to talk about a project. It’s impromptu, and it needs to happen right now. A scheduled session would be inappropriate, adding unnecessary steps. Instead, you would start a meeting immediately and invite attendees.
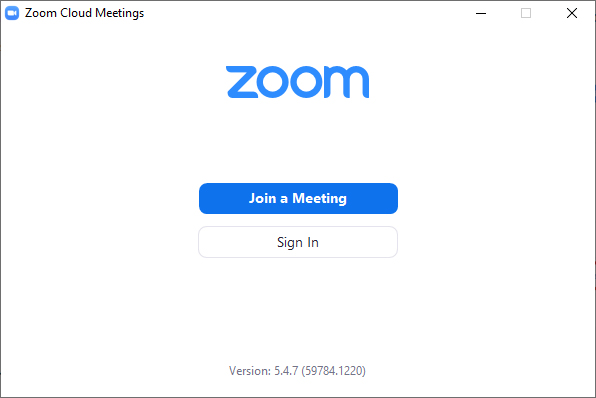
Before you begin, you’ll need a Zoom account. If you already have one, sign in. If not, you’ll need to create one. You can do this through Zoom’s website or the Zoom client. We recommend the latter and will be describing that process. You can download the Zoom client from their website.
After loading the app you’ll have the opportunity to join an existing meeting or log in. Since you’re creating a Zoom meeting, you’ll need to log in.
SEE ALSO: Moving Change of Address Cards and Message Templates
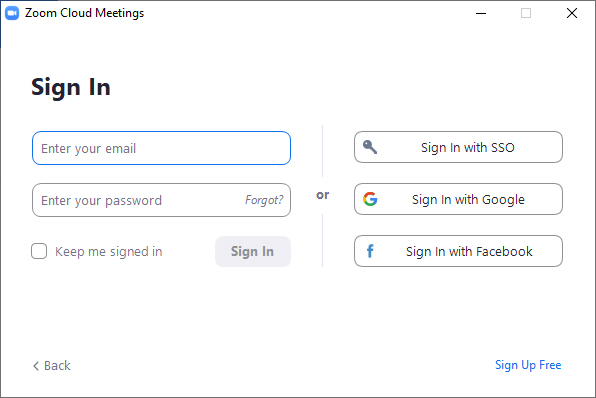
You’ll be presented with a screen where you can sign up for an account or enter your credentials. Type your username and password and click “Sign In”.
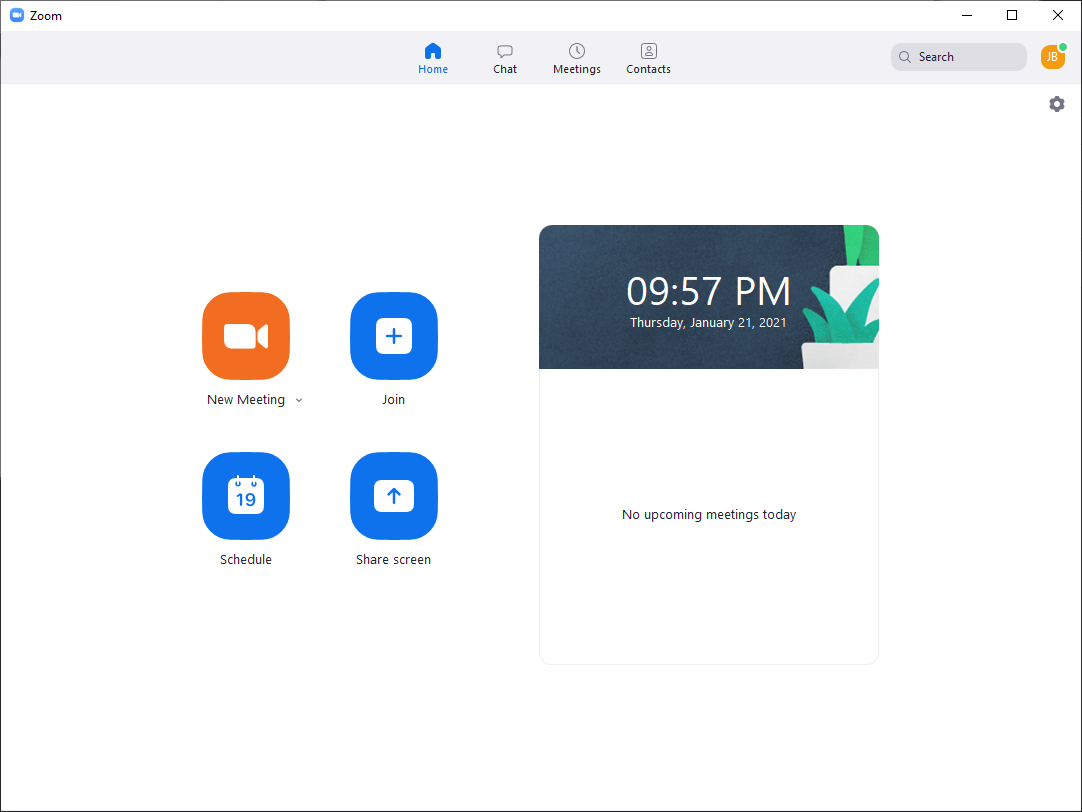
You’ll be taken to the Zoom home screen. Across the top you’ll have access to your home screen, meetings, chat, and contacts. If “Home” isn’t selected, click it. You’ll see four buttons — New Meeting, Schedule, Join, and Share Screen. To create a meeting immediately, click “New Meeting.”
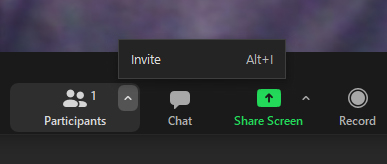
A meeting window will pop up with you as the only participant. If you have video active, you’ll see yourself in the viewport. If you just want to have a chat with yourself, you’re done! But more likely, you’ll want to add participants. To do this, look at the bottom of the screen. You’ll see “Participants” currently showing “1”, which is you. Click the carrot next to the icon and select “Invite.”
If you already have contacts inside of Zoom, you can invite those people directly. Otherwise, click “Copy Invitation” at the bottom.
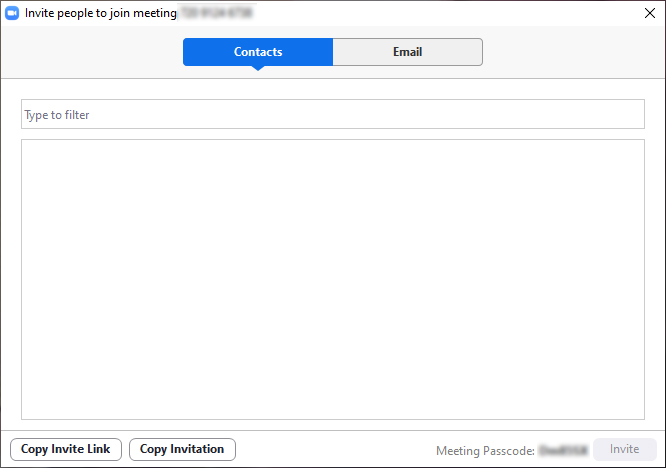
This will add a meeting link, meeting ID, and passcode into your clipboard. Paste this information into an email or a messaging app and send it to your desired participants.
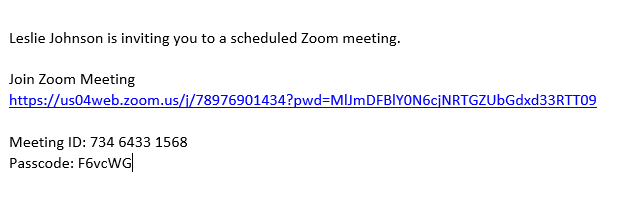
They’ll follow the link and then enter the meeting ID and passcode to gain access. By default, they’ll be added to your meeting’s waiting room. You’ll admit them into your Zoom meeting from there.
Once everyone joins, you’re meeting is underway!
SEE ALSO: 4 Formal Business Letter Samples
Creating a Scheduled Meeting in Zoom
Creating a meeting on the fly using the method we just described can be a bit chaotic. If you have the space to set things up ahead of time, a scheduled Zoom meeting can make the whole process smoother.
To schedule a meeting, go to your home screen and click “Schedule.”

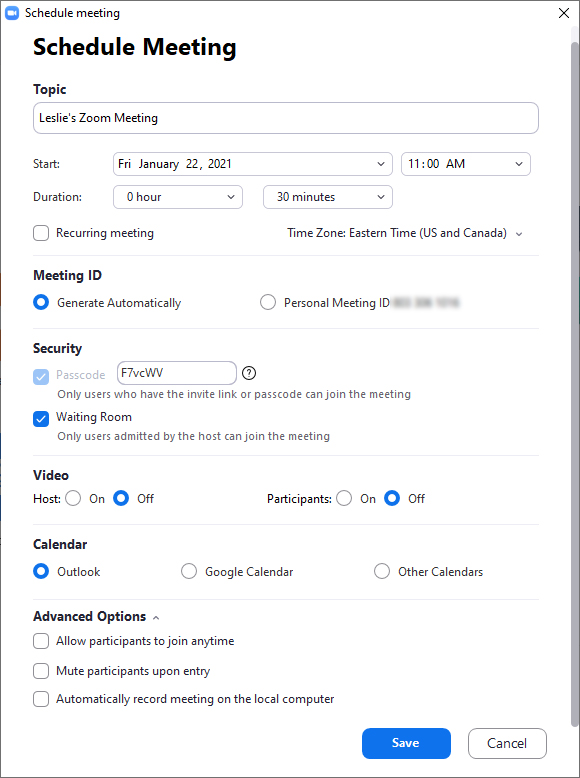
You’ll be able to choose a date and time, meeting duration, and set whether it’s a one-time gathering or recurring. You can choose to use your Personal Meeting ID or have a unique ID automatically generated.
Some accounts require meetings to have passcodes. If yours does, the option to disable it will be greyed out. Otherwise, you can opt to remove the requirement. Finally, you can set options like host and participant default video states, how participants will be added to your meeting, and the default scheduling calendar.
Once you’re happy with your settings, click “Save.”
To find your meeting, click on “Meetings” at the top of the screen. There you’ll see all of your upcoming events. To invite attendees, click “Copy Invitation” next to your target meeting and paste the information into an email or your preferred messaging app. You can also edit meeting details or delete and start over.
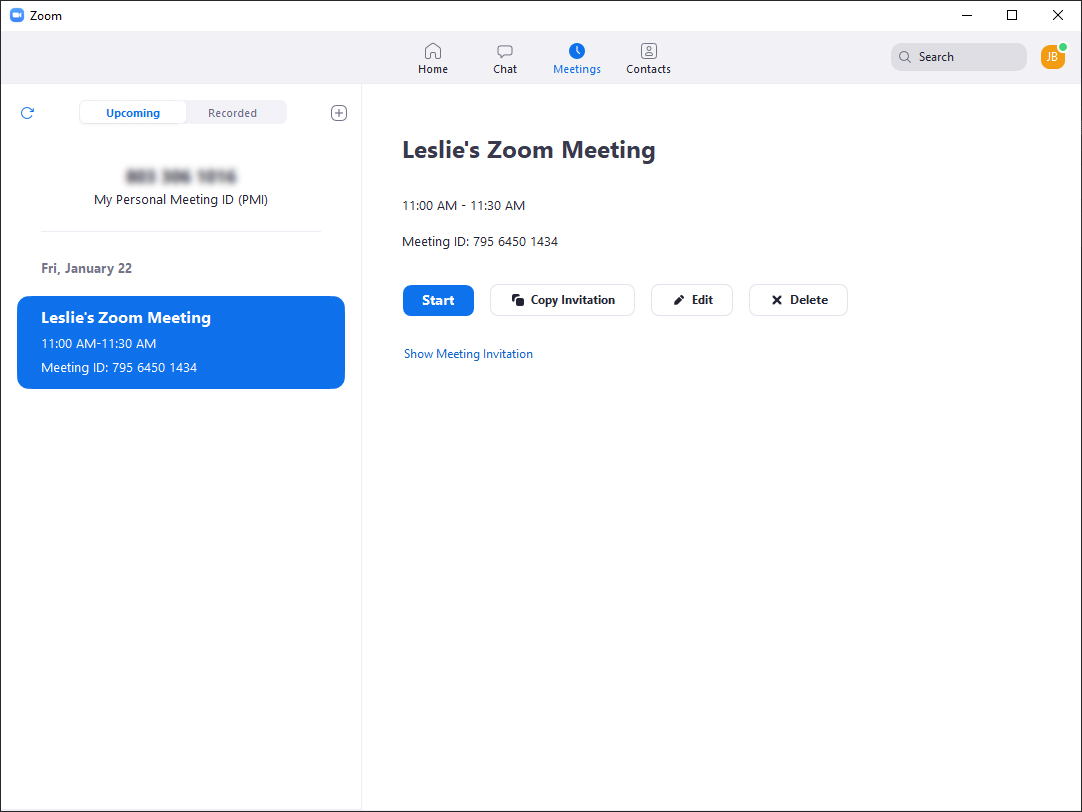
When your meeting’s start time arrives, click “Start” and your meeting will begin. Admitting attendees will work similarly to our earlier example.
See? It’s not that difficult at all! Now let’s refine our approach.
SEE ALSO: 6 Game-Changing Customer Service Ideas
ZOOM MEETING TIPS AND TRICKS
Now that you know how to create a meeting, here are some tricks you can use to improve everyone’s experience.
- You can change your camera and microphone default settings to start in the “off” setting when you join a meeting. This lets you decide each time whether you want to be seen or heard, without having to disable your camera quickly. Go to Settings > Audio > Mute microphone when joining a meeting, and Settings > Video > Turn off my video when joining a meeting. You can also hit the spacebar to quickly mute and unmute your microphone.
- In a real-world meeting, it’s sometimes useful to break into smaller groups for more focused discussions. You can do the same thing in Zoom. Go to Account Management > Account Settings, and under the Meeting tab, go to Breakout Room, and toggle the option on.
- Larger meetings can sometimes be chaotic. You can hide participants that don’t have their cameras on to reduce the clutter. Go to Settings > Video > Meetings, and then check “Hide nonvideo participants.”
- Both free and paid Zoom accounts can record meetings to their local computer (paid accounts can record to the cloud as well.) To activate recordings go to Settings > Recording, and flip it on. Then, when you’re in the middle of a Zoom meeting that you’re hosting, click the Record button in the toolbar at the bottom.
That’s it. You’re now a Zoom meeting master! Of course, there’s always more you can learn. We recommend scanning through all of Zoom’s settings to see what else you can do. Here at Simply Noted, we wish you a good meeting!