No Products in the Cart
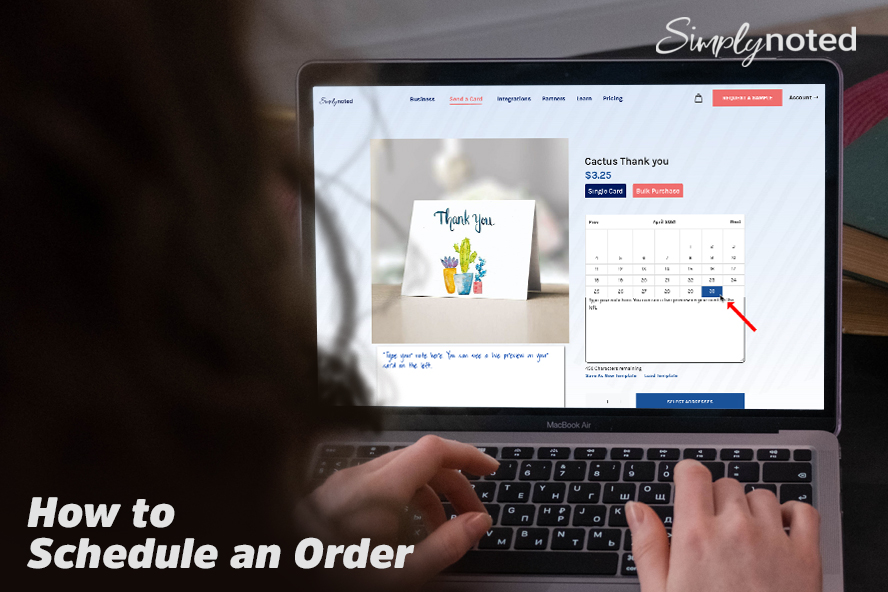
How to Schedule an Order
There are times when you might want to order a card or place a bulk card order and have it sent at a later date. Here are a few real-world examples of when this might happen:
- An individual or business could avoid forgetting important birthdays by ordering automated, handwritten birthday cards for all of their loved ones or business associates ahead of time.
- A business owner might order handwritten company holiday cards a month early to ensure that they’re sent out just before the holidays.
- A nonprofit could schedule thank you cards for all of its regular donors ahead of a large fundraiser to ensure that no one is missed.
Whatever the reason you might have for scheduling real, handwritten cards, Simply Noted makes it easy. Customers simply choose their card and handwriting style, enter the text they’d like written inside, and then choose a mailing date. Your order will wait in our queue until the day you’ve selected, at which point our handwriting machines will create authentic-looking cards with handwritten envelopes and drop them in the mail. The process is truly “set it and forget it.”
To begin, you’ll need an account. If you don’t already have one, you can sign up by clicking “Login” at the top right of the screen and then click “Create an Account.” If you already have one take this opportunity to log in.
SEE ALSO: Why Handwritten Direct Mail Outperforms Print Mail
Choose Your Card Design
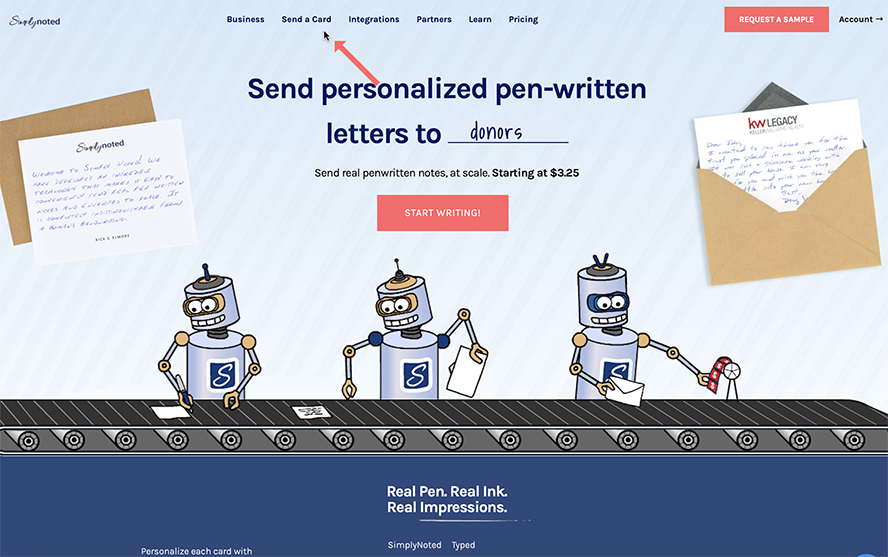
To start your order, select “Send a Card” at the top of the page.
Your browser will load every card we offer. You can narrow your choices by clicking on “All Cards” at the top and then selecting a category, like Birthday , Holidays or corporate change of address cards. The screen will eliminate any cards that are not in your chosen category.

Click “Single Card” to make a one-off purchase or “Bulk Purchase” to simultaneously send your chosen design to multiple recipients. This tutorial will assume a single card purchase, but you can schedule bulk purchases just as quickly. Take a look at this step-by-step guide for bulk purchases to understand the differences.
SEE ALSO: How to Build a Targeted Mailing List
SELECT YOUR SHIPPING DATE
This step is the most critical when scheduling a card order. When the order page loads, you’ll see Optional Shipping Date directly across the page from the card design photo. If you leave this blank, your card will ship within our standard delivery window. This isn’t what you want. You’re looking to have your order mailed out on a specific date.
Clicking the Optional Shipping Date field will bring up a calendar.
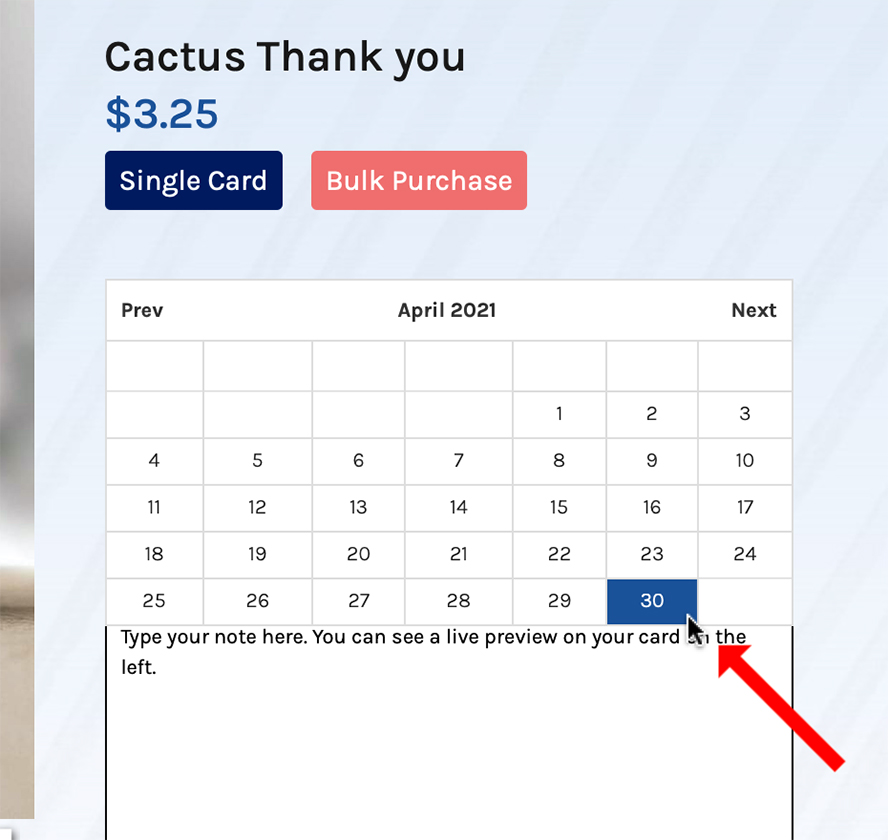
Navigate to the date you’d like your order to be written and mailed, and select it. It will appear in the field.
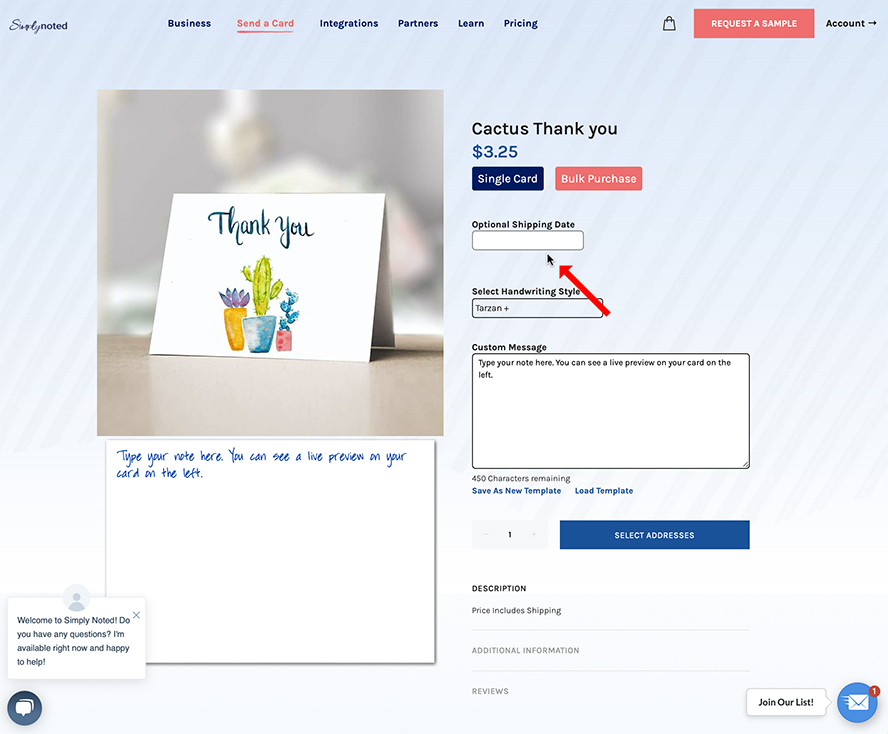
CHOOSE A HANDWRITING STYLE
Below Optional Shipping Date, you’ll see Select Handwriting Style. Tarzan is our default font, but you can change this by clicking on the name.
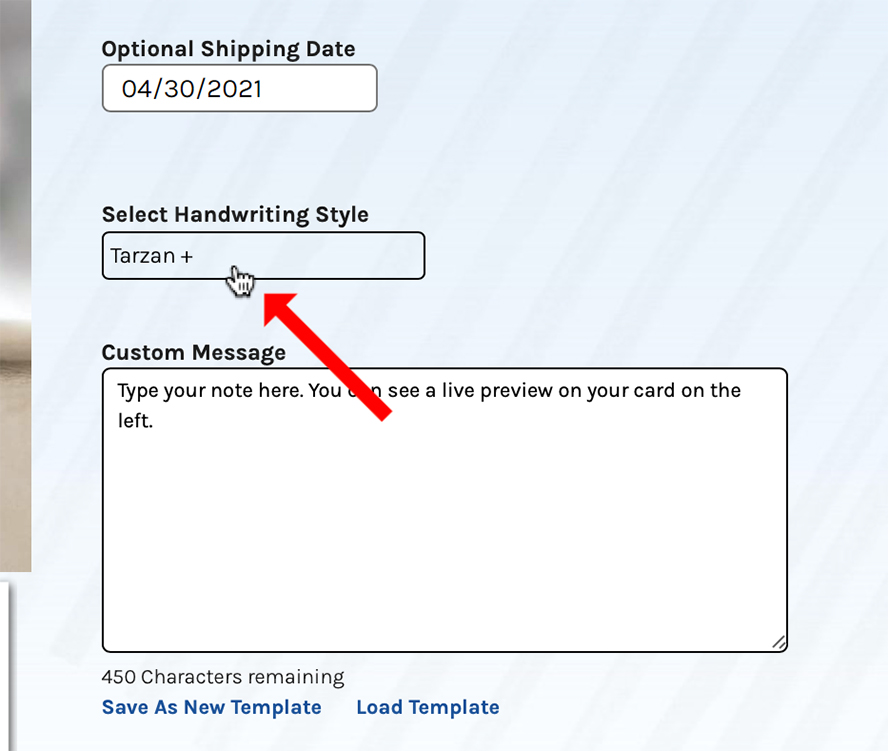
As you move through the available styles, the sample card to the left will update, providing a preview of the final product.
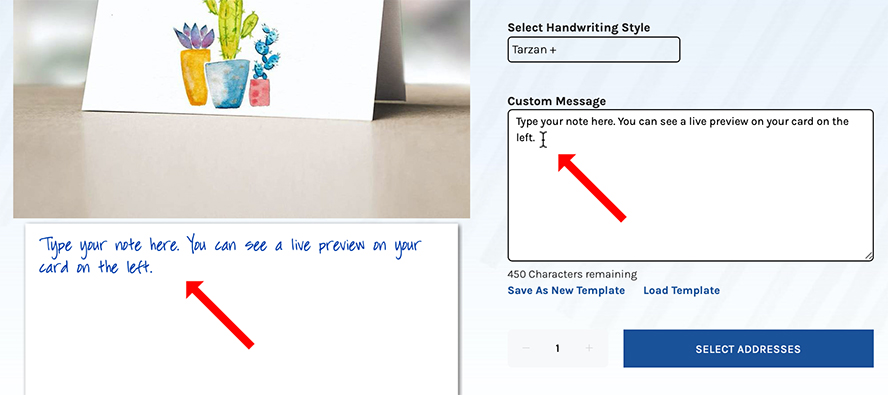
You can select a new font style even once you’ve started entering your message. If you do not like what you see as you type, you can click on the font name and choose something new. The preview window will update to match.
SEE ALSO: Direct Mail Response Rates In 2021
TYPE YOUR MESSAGE
The next blank down reads “Custom Message”. This is where you’ll enter the text you want handwritten inside your card. Be sure to replace the sample sentences with your desired text.
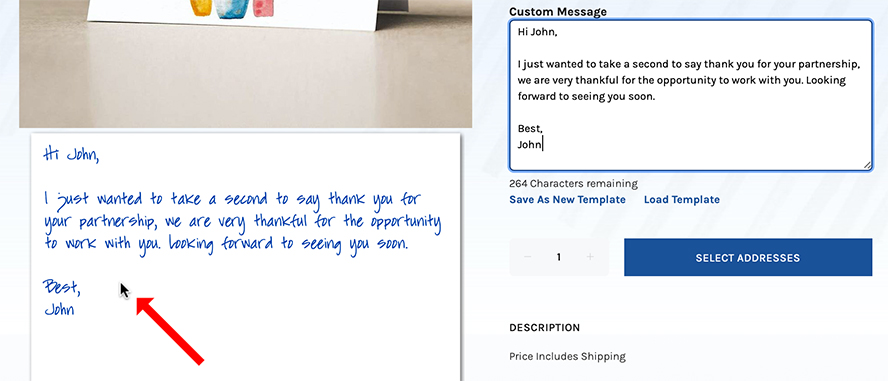
You’ll see the preview card update as your type your message. This provides a very good approximation for your handwritten card’s final look.
You can edit your message all you like. Just be aware that you’re restricted to 450 characters. You can see the total characters remaining on the counter just below the text field.
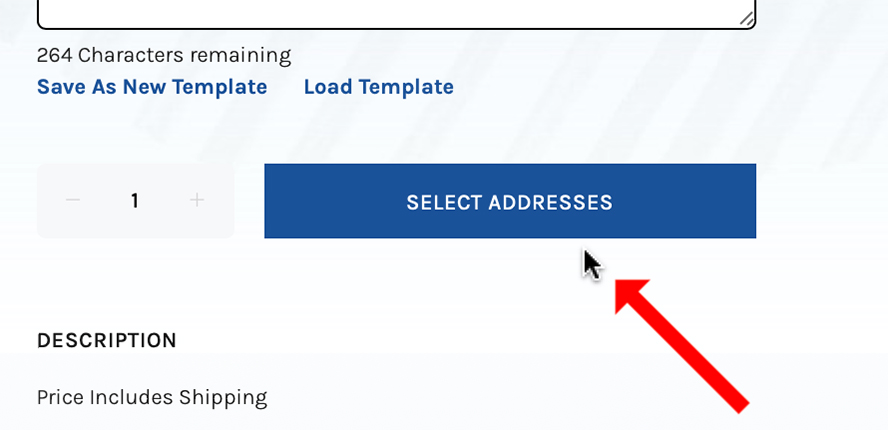
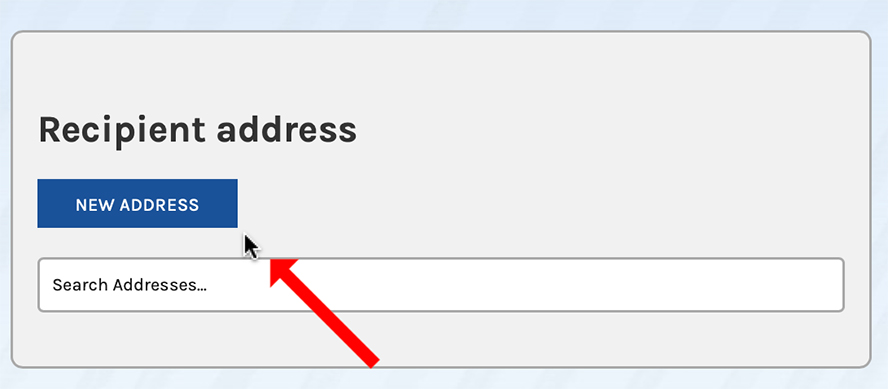
ENTER YOUR ADDRESSES
Click “Select Addresses” to enter your recipient’s information and your return address.
If you’re logged into your account, you’ll have access to previously saved addresses. These are a convenient way to enter commonly-used recipients quickly. Choose “Search Addresses” to pull up a list.
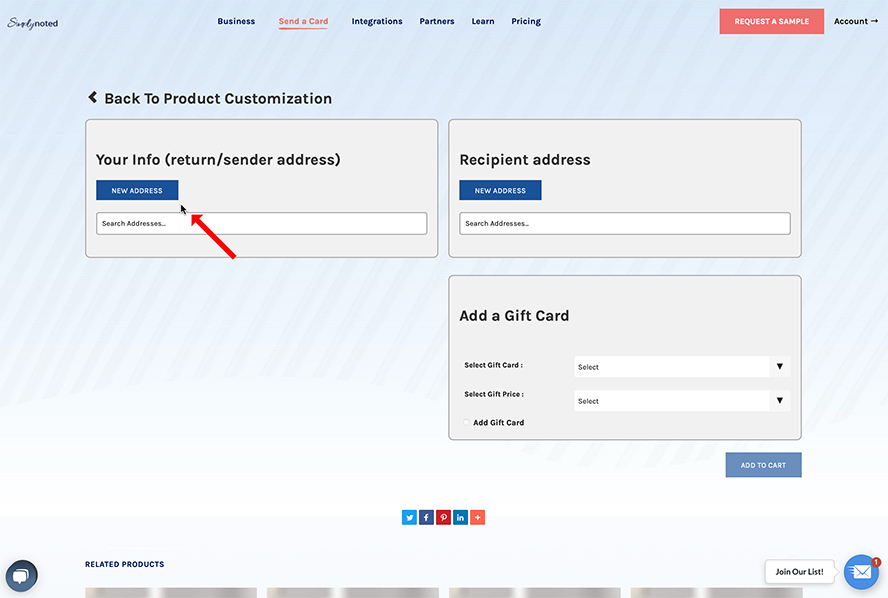
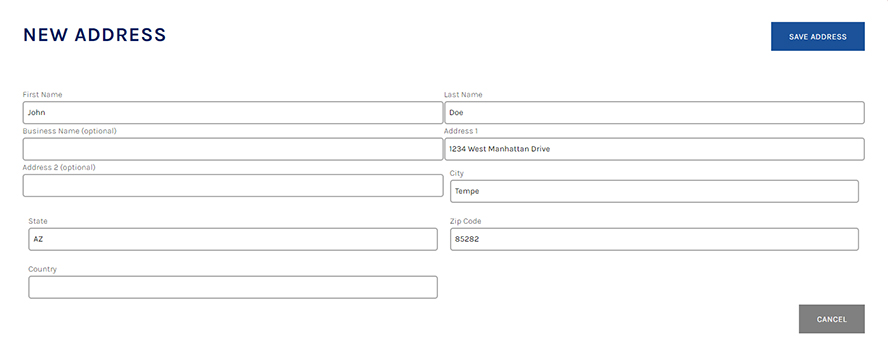
Your return address goes under “Your Info (return/sender address).” Click “New Address” in this section and enter all relevant address information. When finished, save this new address and return to the last screen by clicking “Save Address.”
Now enter your recipient’s information in the next section, in the same manner described above.
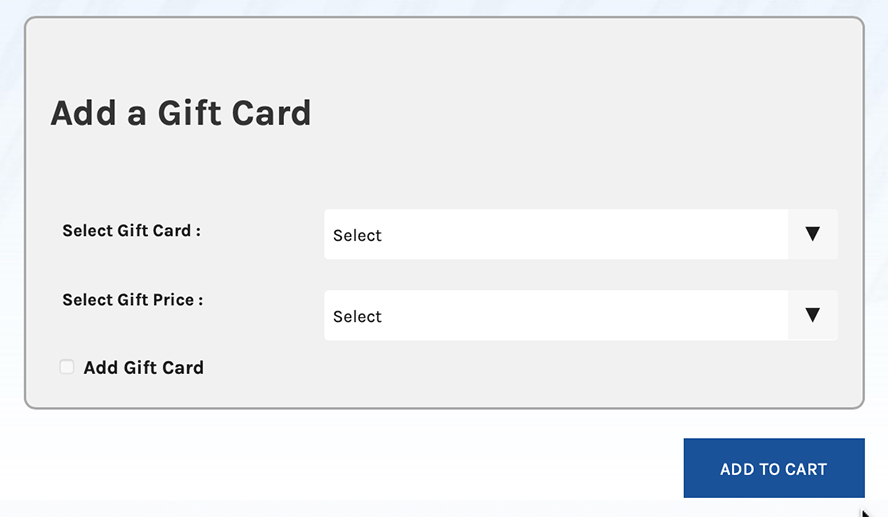
With every card you send, you’ll have the option of including a major retailer gift card. If you’re sending a birthday card, this is a convenient way to include a present. Choose the retailer and dollar amount below the address section.
Once you’ve completed this page, select “Add to Cart.”
SEE ALSO: How 365 Thank You Cards Will Change Your Life (and Your Business)
Finish Your Purchase
All that’s left is to confirm your purchase details.
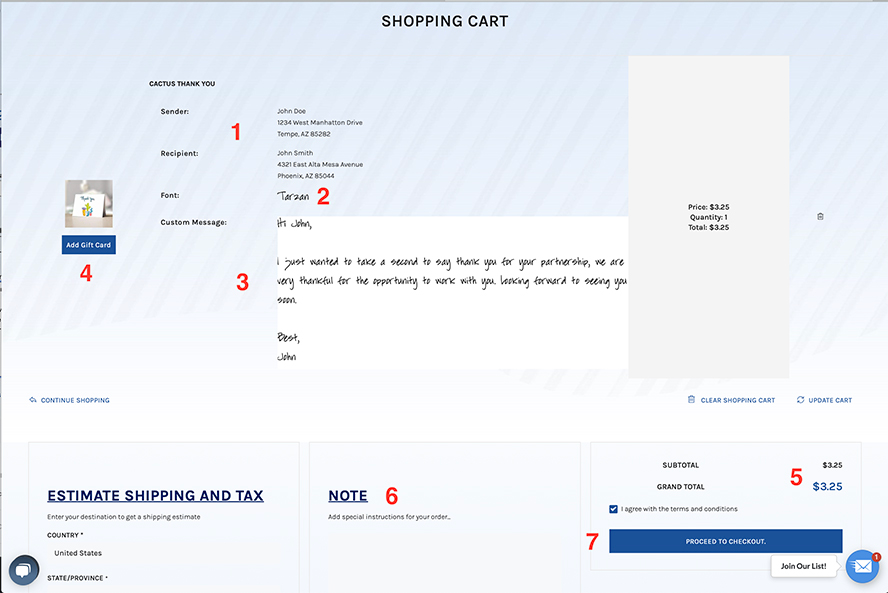
You’ll see your order displayed below with its associated costs to its right. Make certain the proper addresses are displayed at Number 1. Also, confirm the font at Number 2, and your message text at number 3.
If you selected a gift card, it will have a spot in your cart. If not, you’ll have the option to add one at Number 4.
Number 5 reflects your total cost. Enter any special instructions at Number 6.
Once you’re sure everything is entered correctly, agree to the terms and conditions and click “Proceed to Checkout" at Number 67. There you’ll finalize your payment information and complete the purchase.
That’s it! Without fail, we will fulfill your order on the date you chose. Scheduling cards with Simply Noted is the best way to ensure that you never miss a special occasion or lose the opportunity to strengthen business relationships.
Your genuine, handwritten messages will find their way to your recipient’s home and into their heart precisely when you want them to, every time.
And don’t forget! You can schedule bulk purchases as well. We can deliver when you need us, regardless of the quantity.
Companies we've worked with


 Get your first card FREE!

Join our email list and receive your first card free.
Ready to start writing?
AI Message Assistant
Type in words or a phrase to use our AI Assistant to
help generate a great message.
Characters Remaining: 450
Loading...