No Products in the Cart
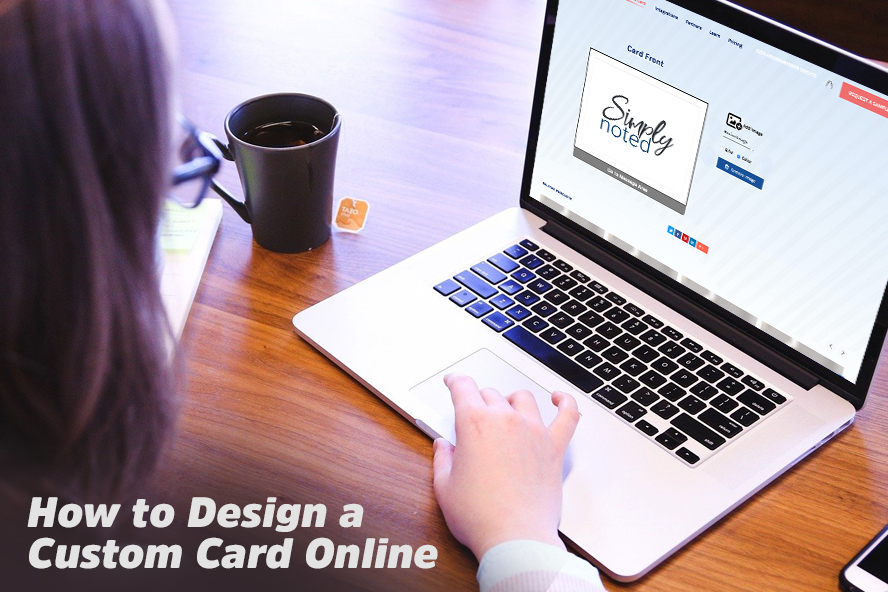
How to Design a Custom Card Online
We offer a wide selection of card designs here at Simply Noted. Our automated handwriting machines can pen a heartfelt message for you, whether you need a birthday card, thank you note, congratulations message, or you want to wish someone happy holidays. Our designs range from tasteful and sophisticated to fun and whimsical.
But what do you do if you need a custom design? For those times, we provide our customers an easy-to-use tool for creating precisely the card they need. This post will walk you step-by-step through the process.
To begin, log into your account by clicking “Login” at the top right of the screen. If you don’t have one, you’ll be able to create a new account. This is an important step because it allows you to save your completed card. Also note that credits can’t be used with custom cards.
SEE ALSO: How to Schedule an Order
ENTER THE CARD CREATION TOOL
Creating a custom card is easy. First, hover your mouse cursor over “Send a Card” at the top of the screen.

Now choose “Create a Card” from the menu.
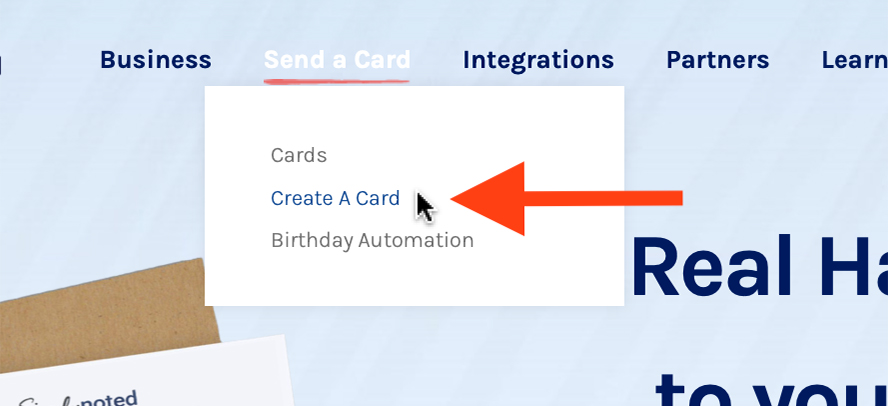
Alternatively, you can click on “Send a Card” and then click the first item in the list, “Create Custom Card.”
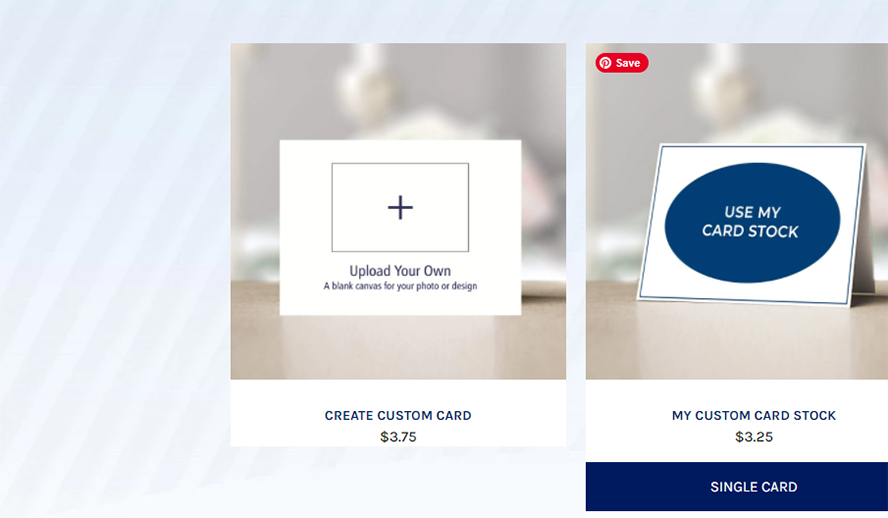
The card creation interface will load. From within this screen, you’ll be able to choose your preferred card style, upload an image for the front of your card, and enter the text you want handwritten on the card’s rear or inside. Let’s look at each step individually.
CHOOSE YOUR CARD STYLE
You can opt for a 5x7 flat, postcard-style note or a traditional 5x7 top-folding card.
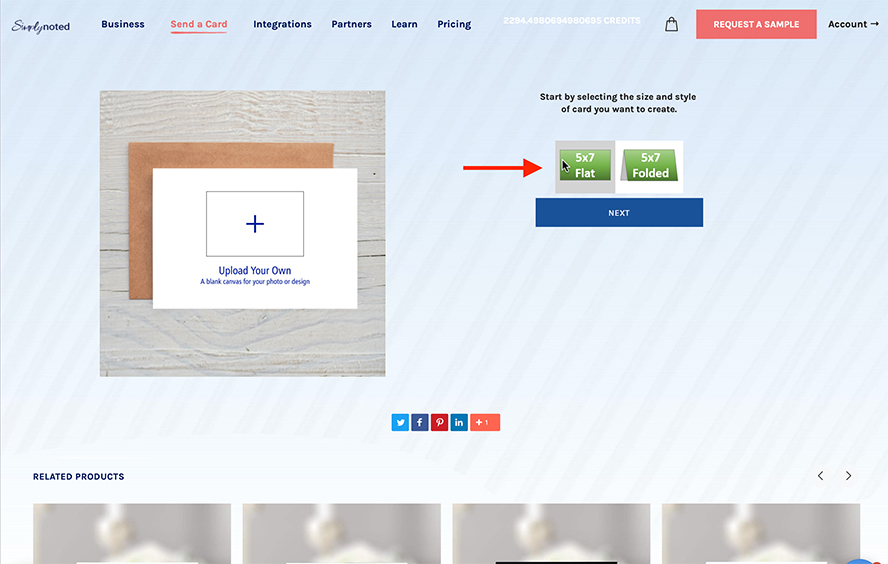
With postcard designs, your image will sit on the front and your handwritten text will be added to the back. With a folded card, your image will go on the front and your text will be penned on the inside. Choose the style you prefer and then click “Next.”
SEE ALSO: How to Build a Targeted Mailing List
And an Image to the Front of Your Card
Your custom card will proudly display your chosen image on its front. There are a few things to consider to get the best possible quality.
Image Quality Considerations
For the best quality, restrict your image selection to logos, text, and graphic illustrations over white. We don’t recommend using photographs.
Be sure to use high-resolution art. 300 dpi (dots per inch) is the minimum resolution we recommend. Anything smaller than that may appear fuzzy or blurred when printed.
Your card should be around 2200 pixels wide by 1500 pixels tall to completely fill the available print area. Of course, these dimensions may not apply, depending on the shape of your artwork. What’s important is that the image is as large as it can be (although simply blowing up low-resolution artwork won’t fix the problem — it needs to be created high-res from the start.) Simply Noted isn’t liable for poor quality prints due to low-resolution artwork.
Logos, text, and decorative images should either be placed over white and saved as a JPEG or saved with transparency as a PNG. Both will print nicely as long as they’re sufficiently high-res.
Upload Your Image
To upload your image, click “Add Image.”
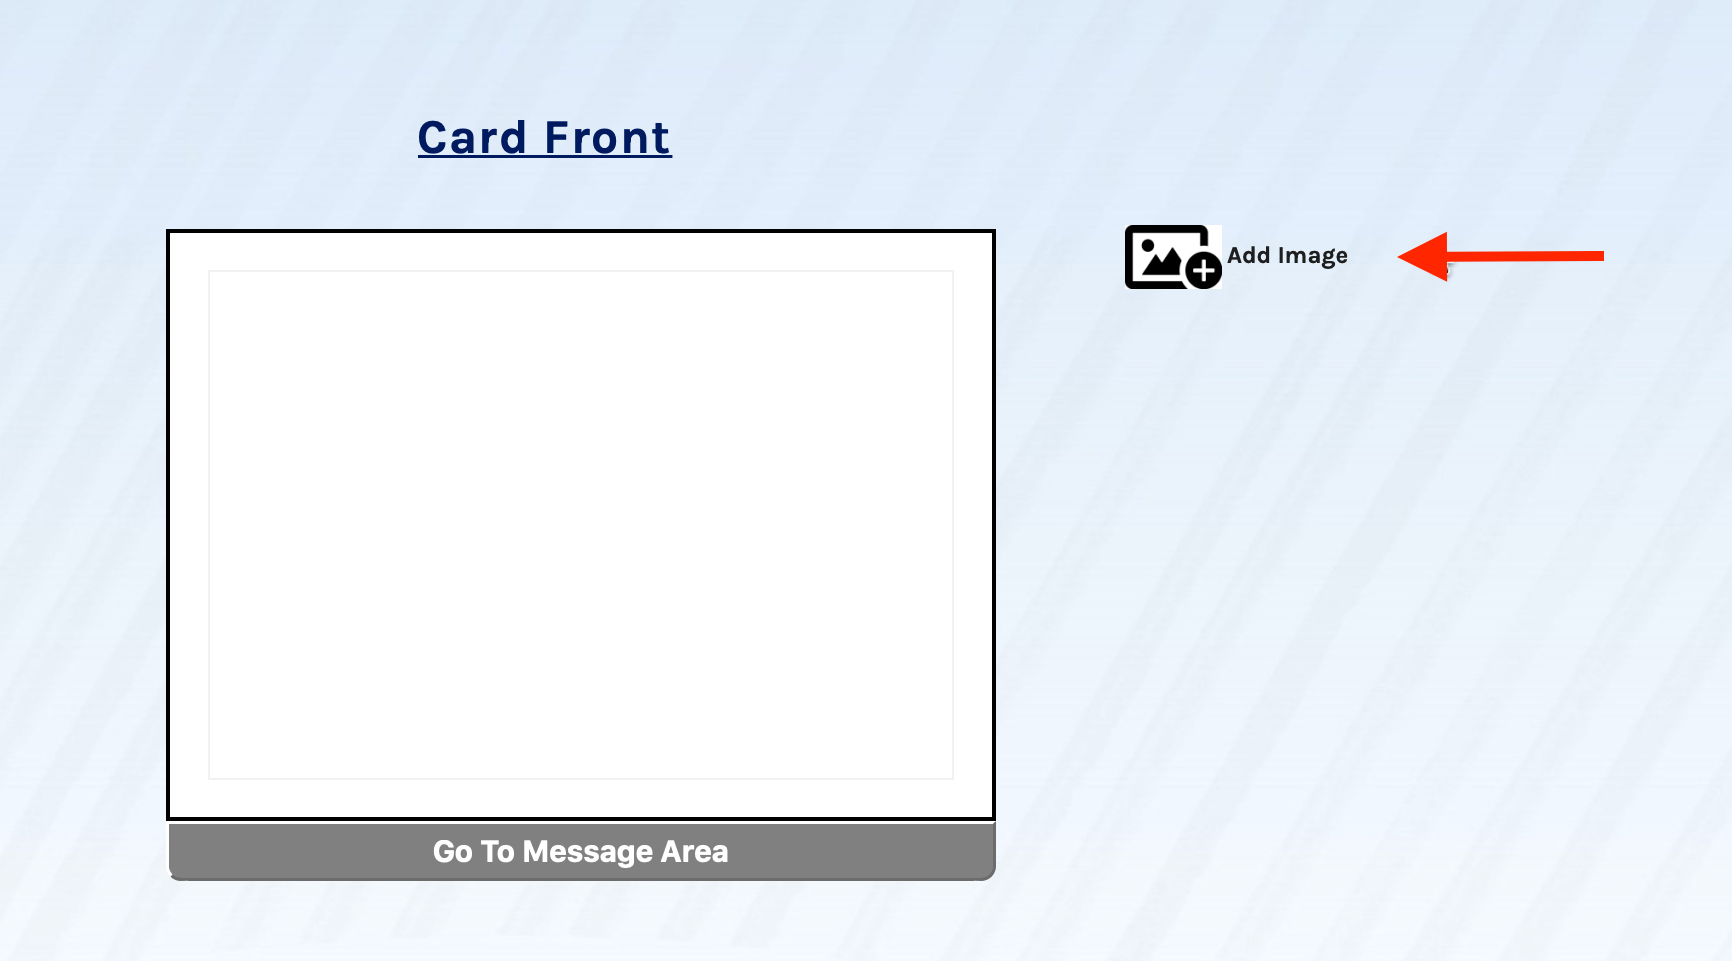
The card preview to the left will update to reflect your artwork. If the image is too large, you can resize it using the slider marked with the number 2 in the image below.
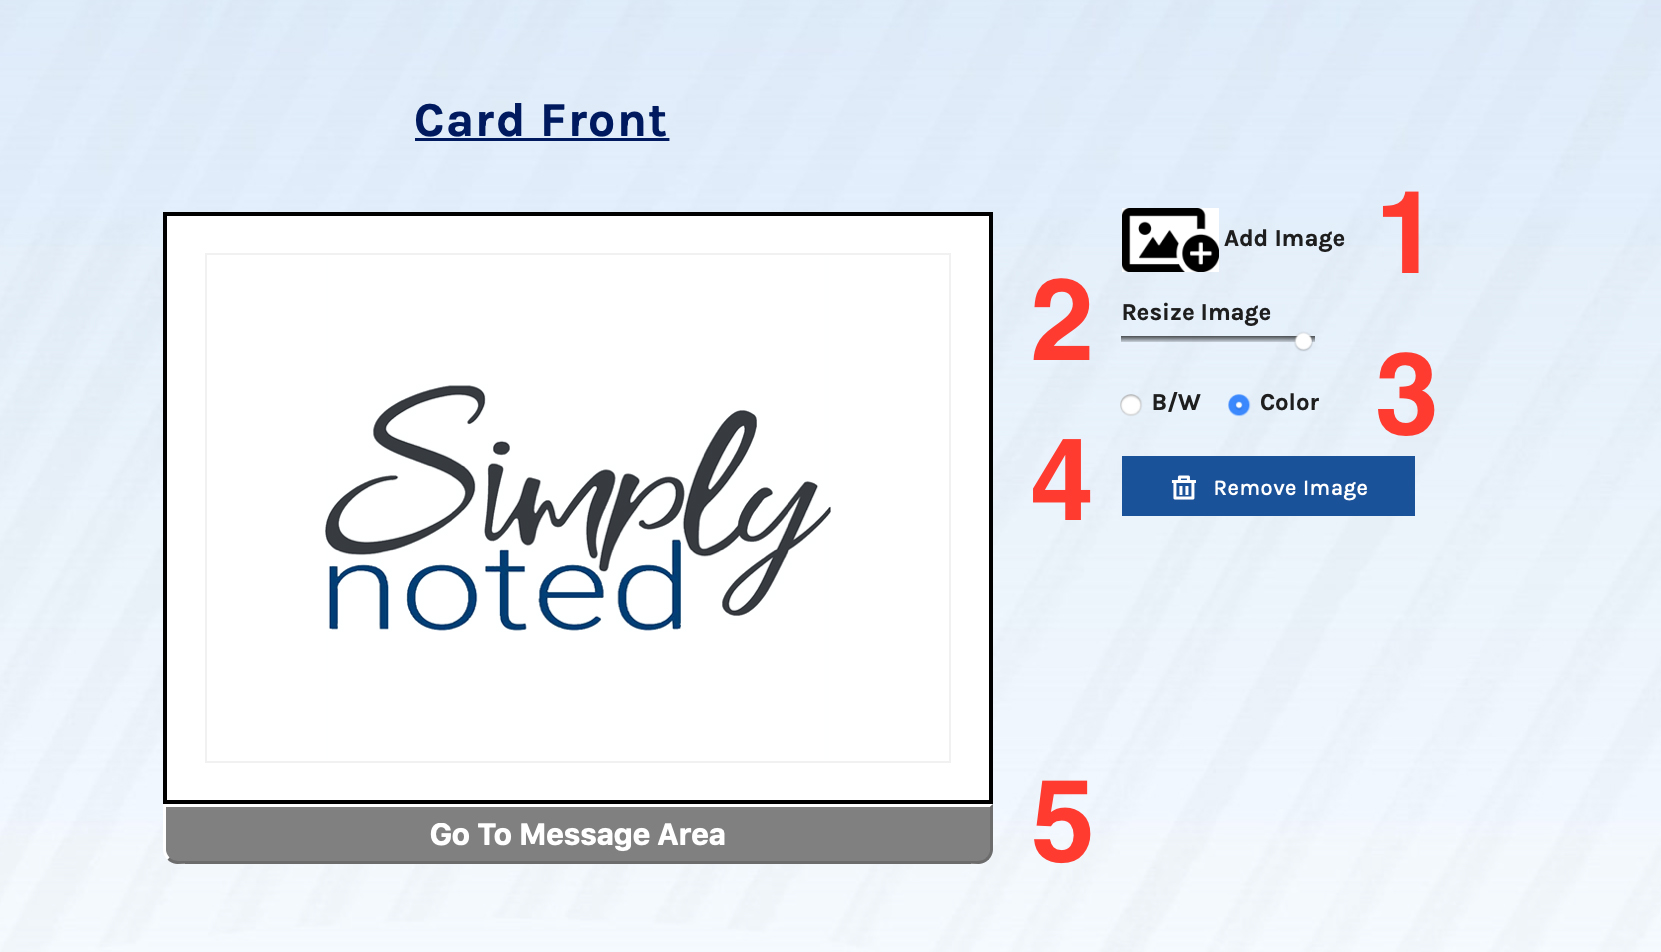
Using the radio buttons marked with the number 3, you can switch your artwork between black and white and color (if your image was originally black and white, both choices would be identical.)
If you want to change your image, first click “Remove Image” (marked with the number 4) and then click “Add Image” again.
Once you’re happy with the front of your card, click “Go to Message Area,” marked with the number 5, to move to the back/inside and enter your text.
SEE ALSO: How to Thank Essential Workers
ENTER YOUR MESSAGE
The message area is where you’ll enter the text you want handwritten on your card.
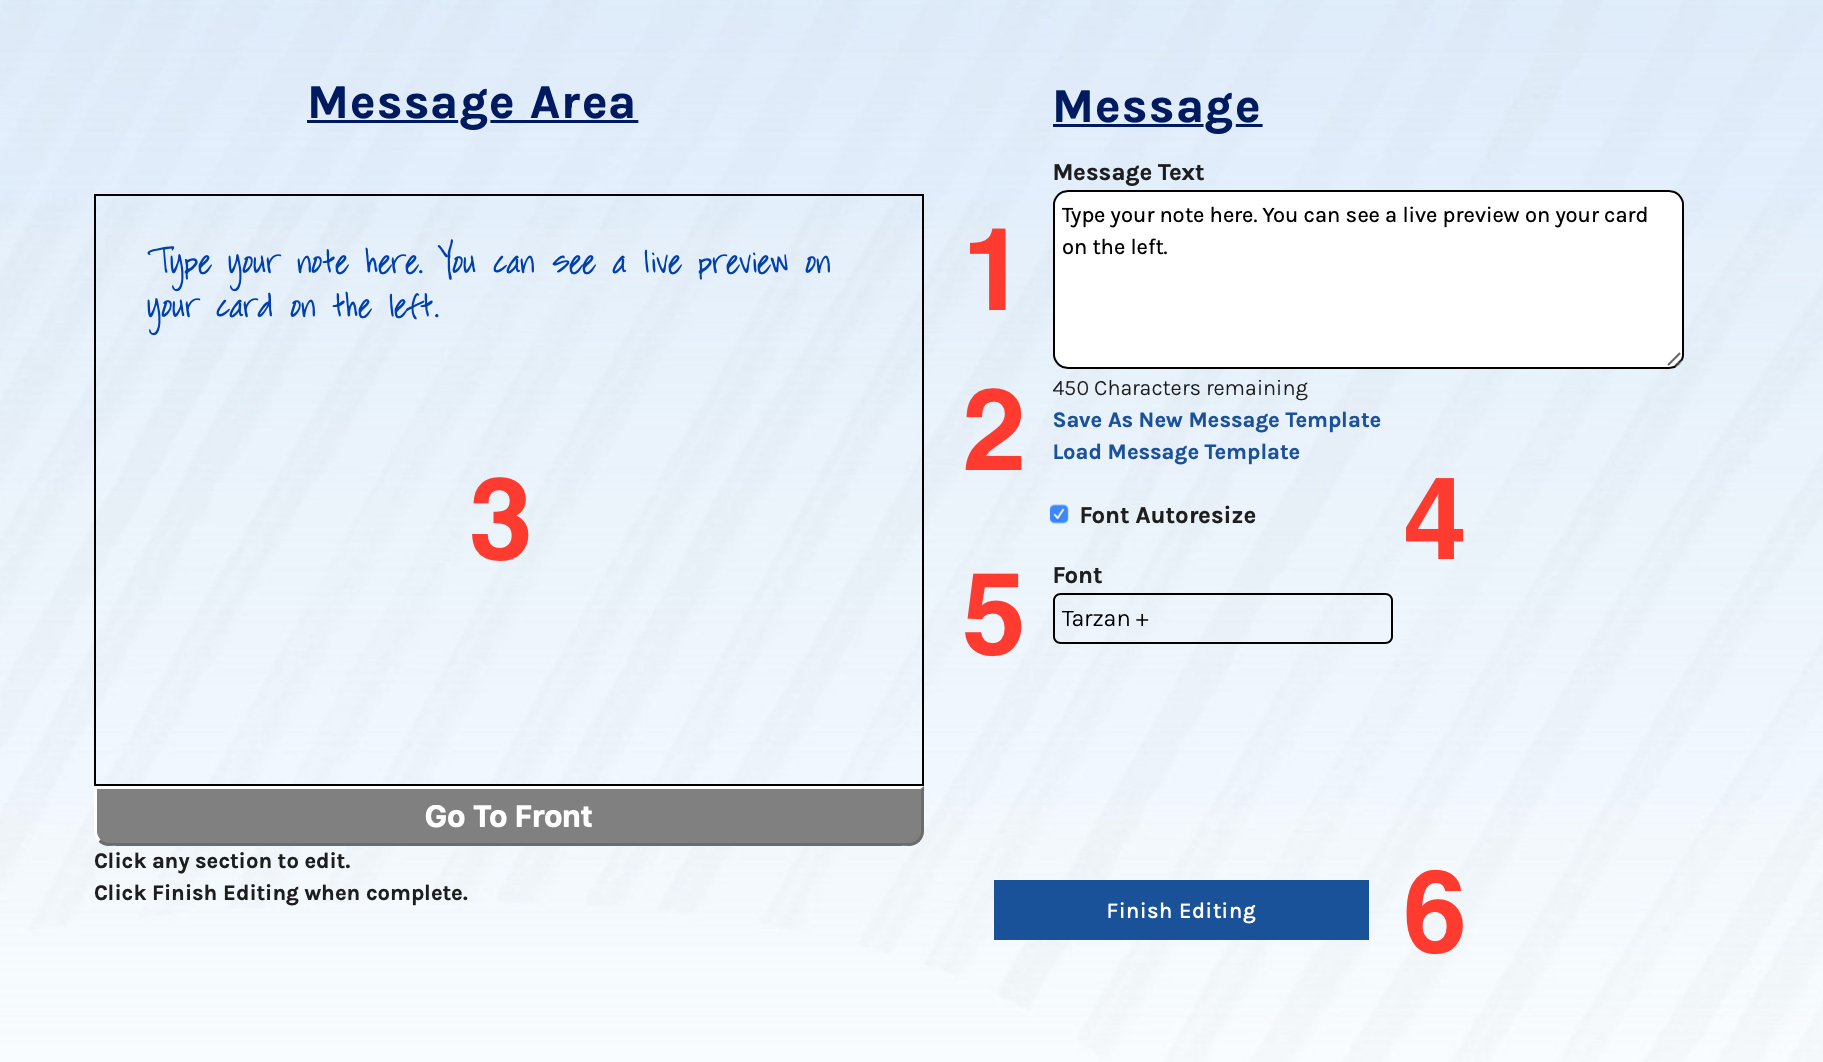
Number 1 is the message text area, where you’ll type your card’s handwritten content. As you type, you’ll see a sample of your text appear to the left (Number 3) in the font you’ve chosen. To choose a different font style, click on Tarzan (Number 5), our default font, and pick a new style from the list. As you switch between fonts, the preview to the left will update.
You can enter up to 450 characters. Watch the remaining characters counter below the message text field, marked by the number 2, to see how many you have left. Here you’ll also see links to save and load message templates. This feature is helpful if you use the same message text frequently. You can save it as a template and recall it for quick use in future cards.
At number 4, you’ll see the option to have your font autoresize. It’s checked by default. This option enlarges or shrinks your font as needed to fit your card. Alternatively, you can uncheck this option and choose a font size manually.
Before you finalize your card, you can edit the front again by clicking “Go to Front” below the preview area on the left.
Once you have everything as you like it, click Finish Editing at number 6.
FINALIZE YOUR CARD
After you finish editing, a dialogue box will appear, asking you to name your card and save it.
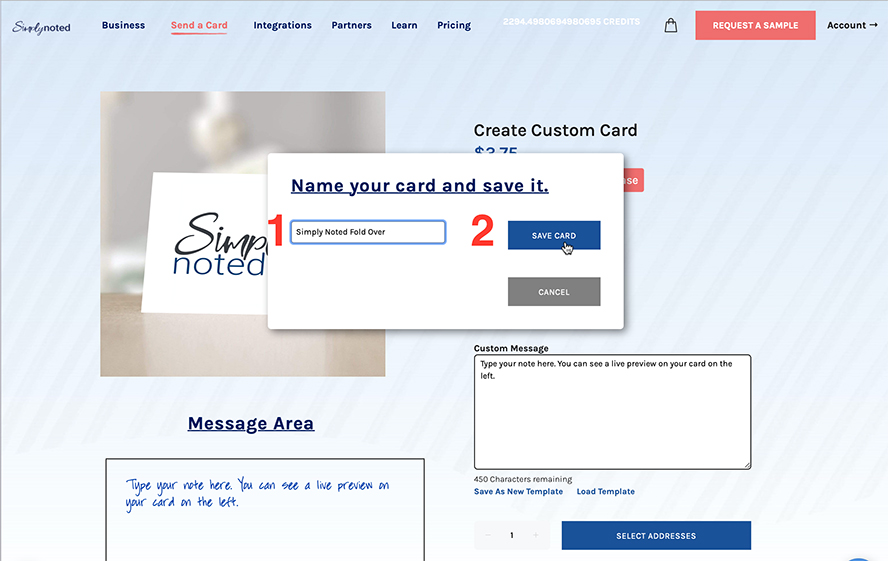
You can choose whatever name you like. Hit “Save,” and your card will be added to your library and saved to your account.

The next time you go to pick a design, you’ll see your custom artwork among our standard choices, as the image below demonstrates.

Clicking “Save” will drop you into our card ordering page. You’ll see your custom design as well as your text and font choices. All that’s left to do is add your addresses, place the card in your cart, and finalize your order. We provide instructions for single card orders and bulk card orders.
Congratulations! Your custom card is finished and ready to mail!
Companies we've worked with


 Get your first card FREE!

Join our email list and receive your first card free.
Ready to start writing?
AI Message Assistant
Type in words or a phrase to use our AI Assistant to
help generate a great message.
Characters Remaining: 450
Loading...